
How to Grade with AutoMark
From a stack of essays to reviewed grades and feedback, step by step. You stay in charge of every score.
AutoMark reads each student paper against your rubric, suggests a score for every criterion, and writes comments and overall feedback. You review it, change anything you disagree with, and approve. Nothing reaches a student until you approve it.
This guide walks through one full assignment: a 10th-grade argument essay with four student papers.
New to AutoMark? Create a free account, then follow along. If your school uses Canvas, Blackboard or Brightspace, your AutoMark courses may already be connected. You can skip Step 1 and open AutoMark from your course.
What you need
- An essay or short-answer assignment
- Your rubric. If you don't have one, start from a template.
- Student papers as PDF, Word or text files, or a course connected to your LMS
Step 1: Create a course
Open the course menu in the top-left corner and choose Create new course. Give it a title and a grade level. The description is optional, but a sentence about the course and its focus helps AutoMark pitch feedback at the right level.
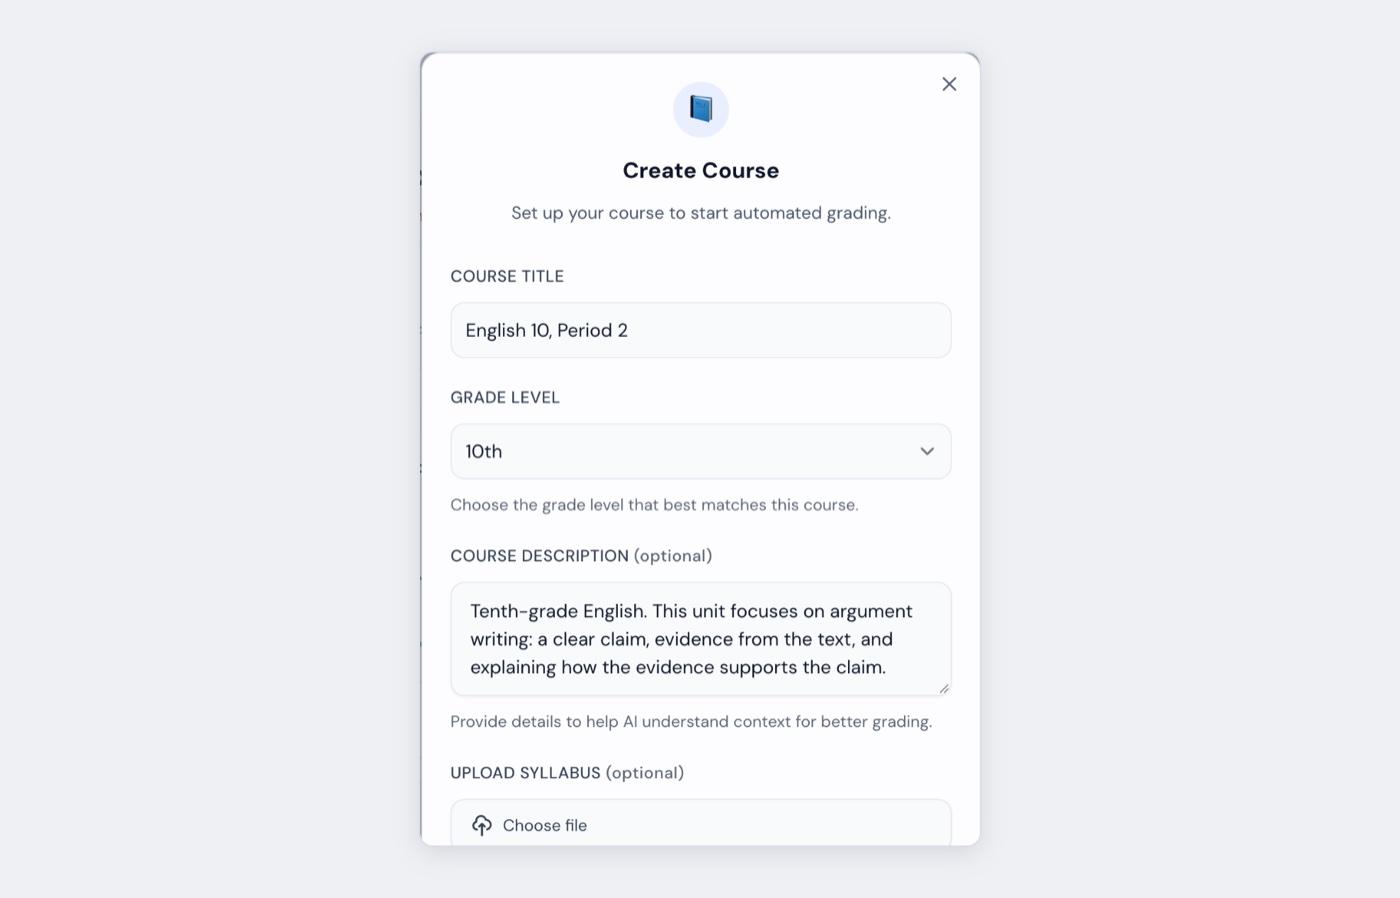
To import papers from Google Classroom, choose Connect Google Classroom here instead. Canvas, Blackboard and Brightspace courses connect through your school's integration. See the Canvas and Blackboard guides.
Step 2: Create the assignment
In your course, select Create Assignment. Enter a title and choose the grading type:
- Essay grades longer writing against rubric criteria.
- Short Answer grades question by question against an answer key. Use it for quizzes, worksheets and math-style answers.
Open Add the assignment prompt and paste the instructions you gave students. AutoMark uses the prompt to check whether each paper answers the question.
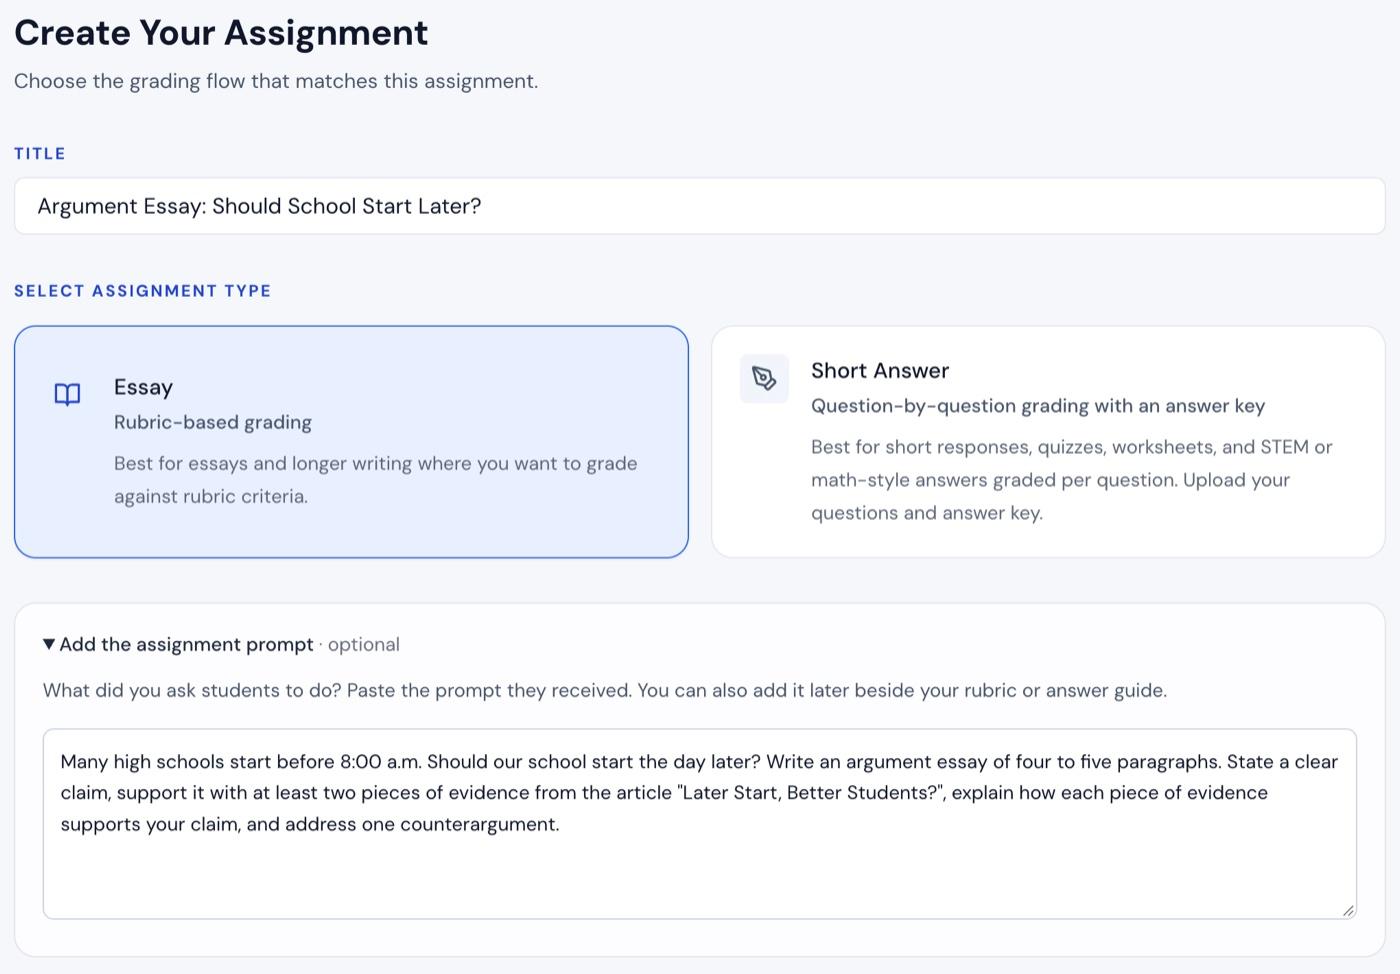
Select Continue.
Step 3: Set up your rubric
Choose where your rubric comes from:
- LMS Rubrics imports a rubric already attached to the assignment in your LMS.
- Templates offers ready-made rubrics for argument, literary analysis, research papers and more.
- Upload Your Rubric reads a PDF or Word rubric.
- Copy Assignment Setup reuses a rubric from an earlier assignment.
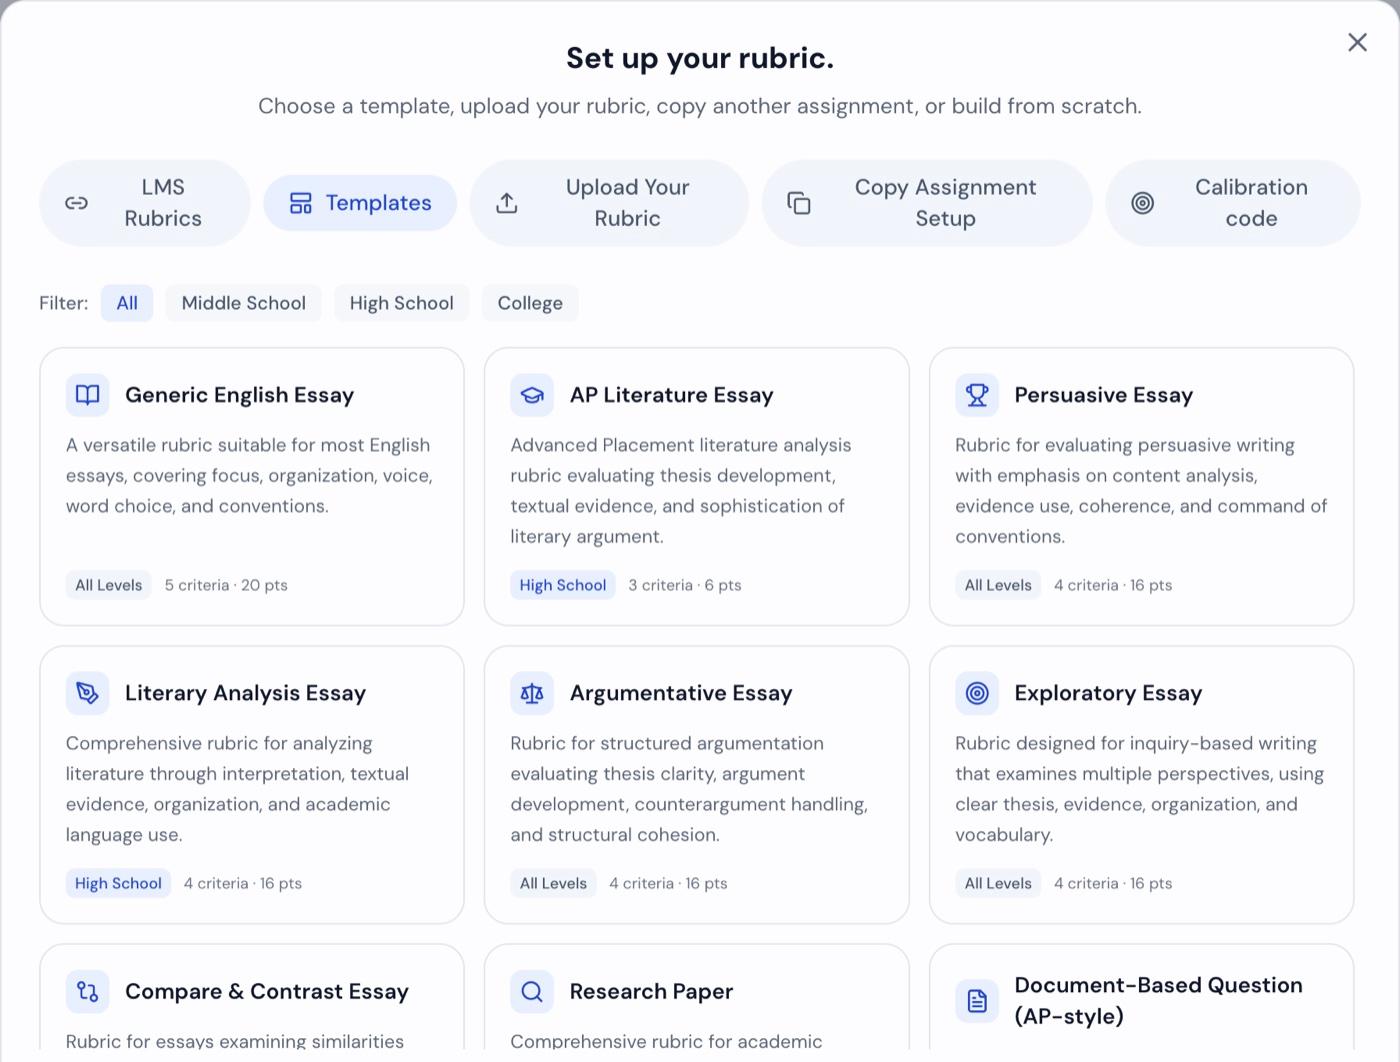
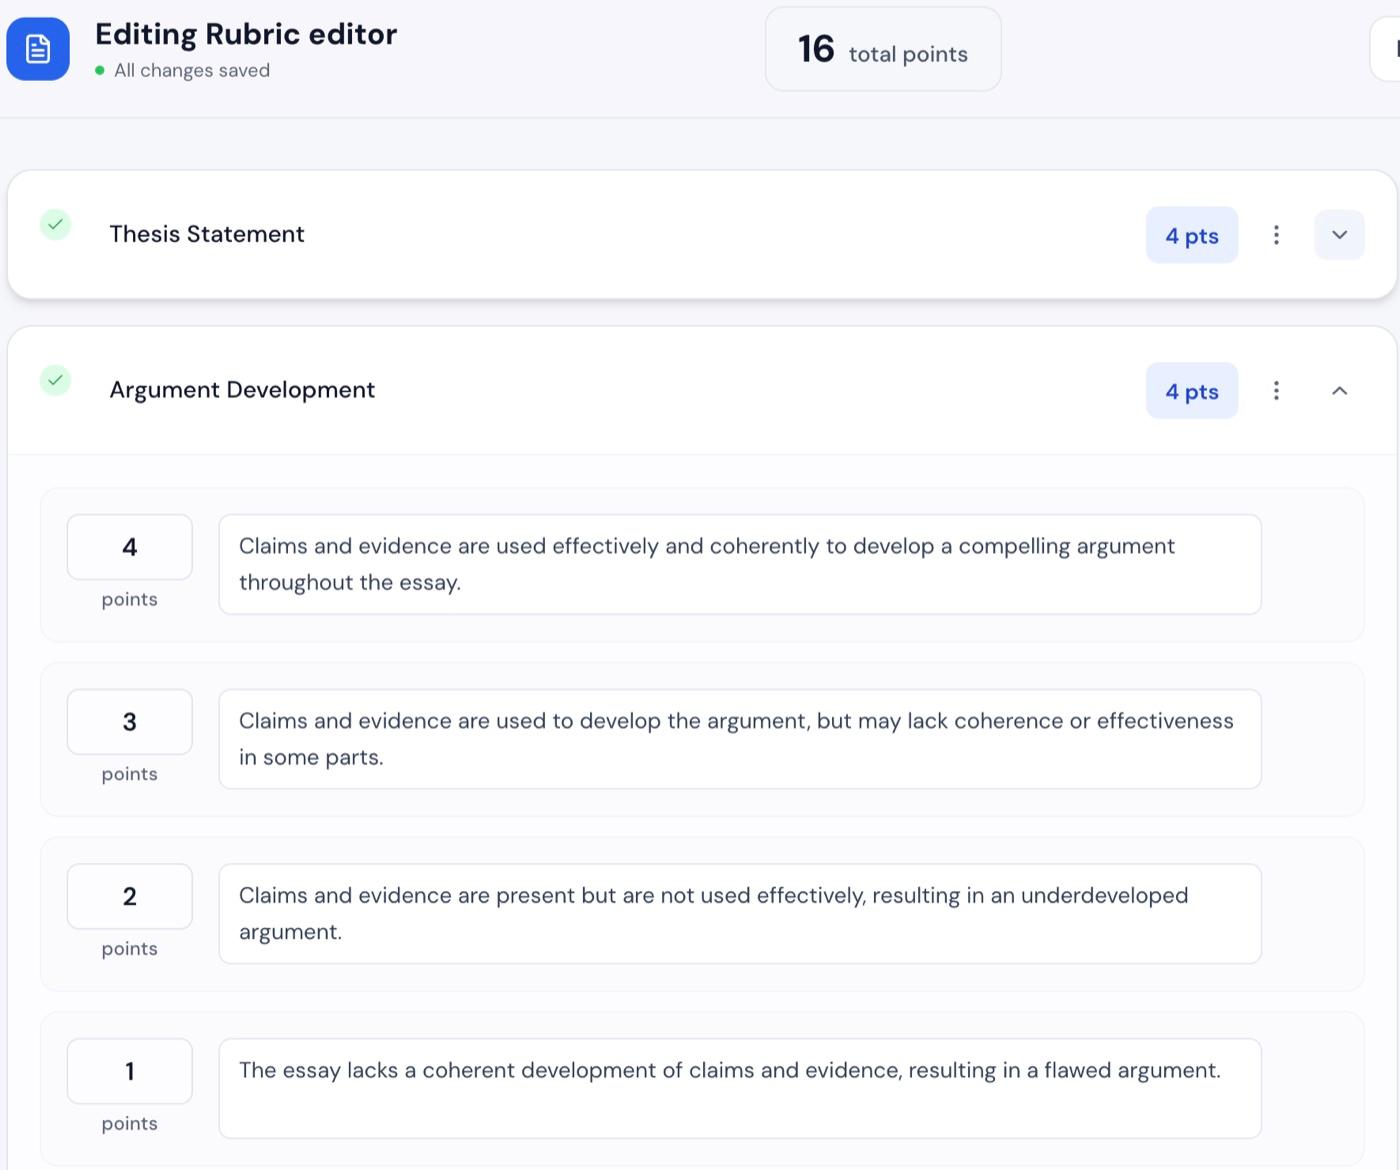
Every criterion and level can be edited. Rename a criterion, change the points, or rewrite a level description so it says what you actually look for.
The panel on the right, Guide the grading, is optional. Add grading guidance there, such as your priorities or how blunt to be, along with reference readings. Then select Save Rubric & Continue.
Step 4: Add student papers
Drag in your students' files, or select Choose Files. Upload one file per student and name each file after the student, for example Maya Torres.docx. AutoMark uses the file name as the student's name.
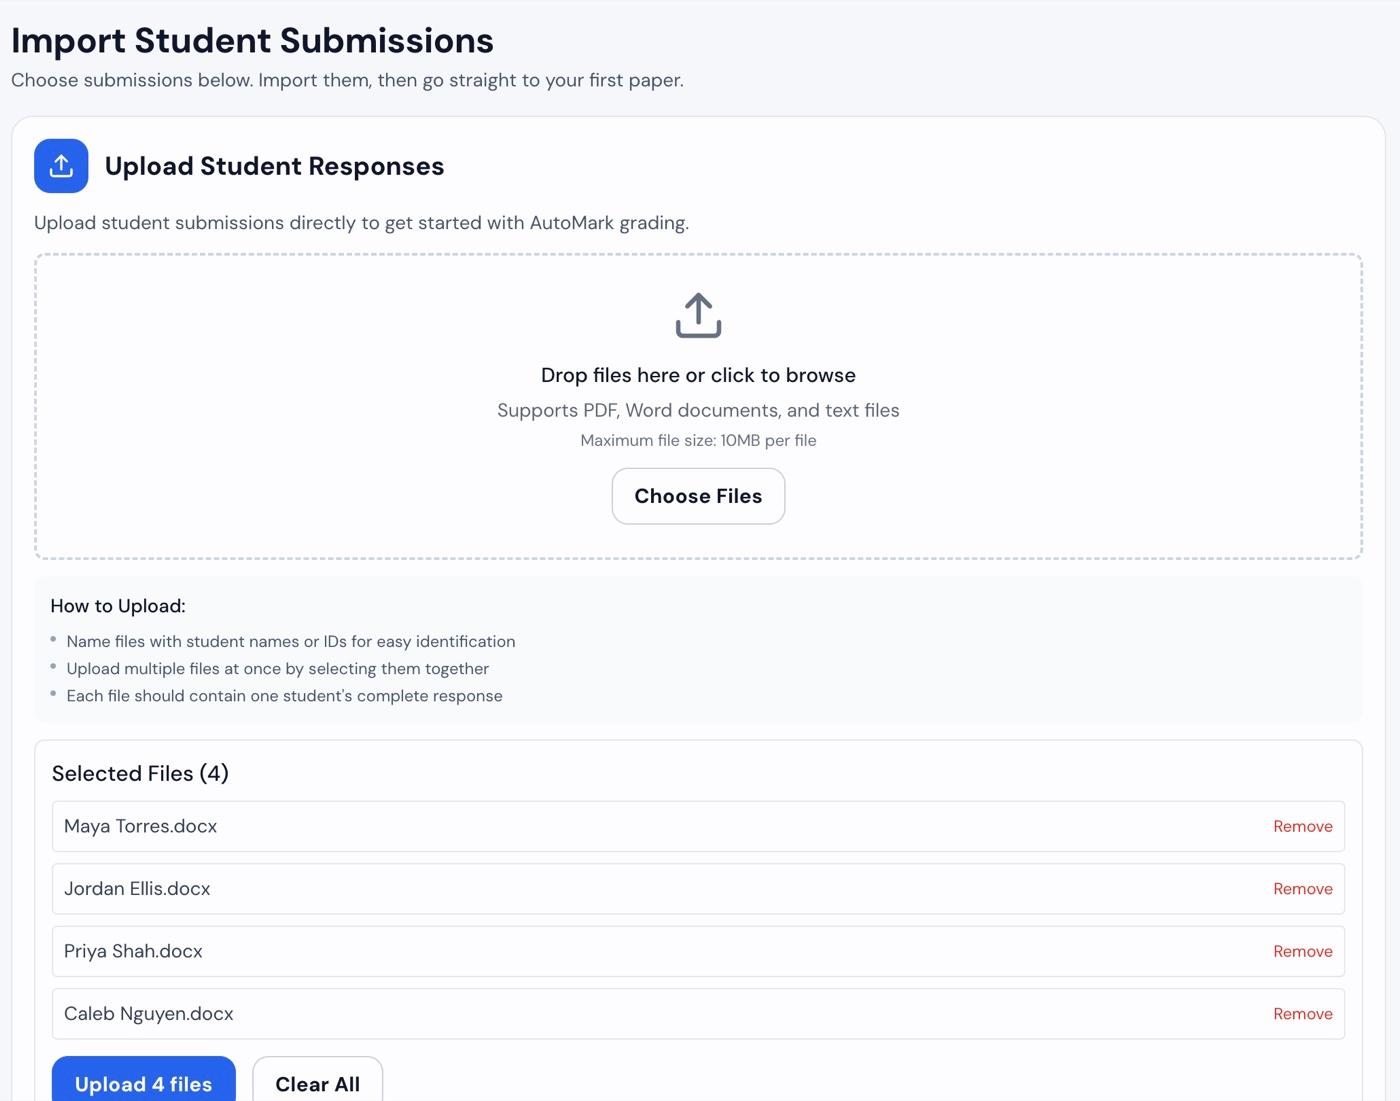
Select Upload and AutoMark starts grading right away. The first paper opens as soon as it's ready.
If your course is connected to an LMS, import the submissions straight from the assignment instead.
No papers yet? Select Generate sample response on this screen. AutoMark writes one fictional paper and grades it, so you can see the review screen before your class submits.
Step 5: Review each paper
This is where you spend your time. Each paper opens with:
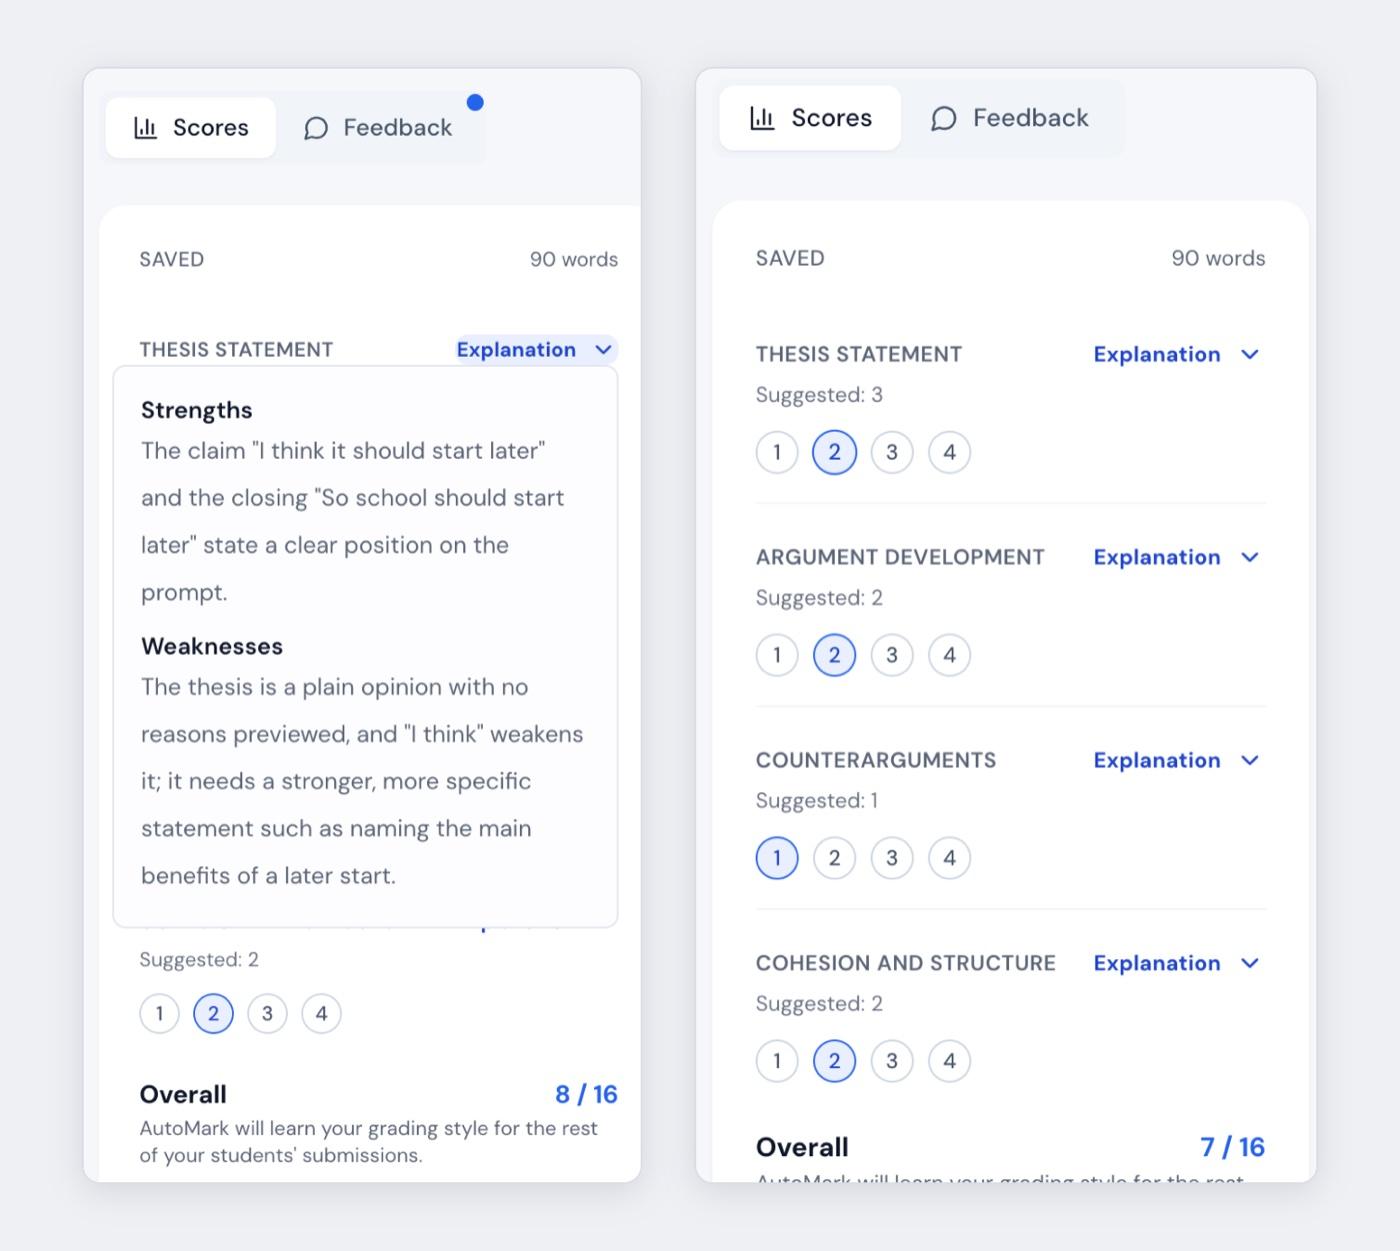
- Scores on the left: a suggested level for every rubric criterion.
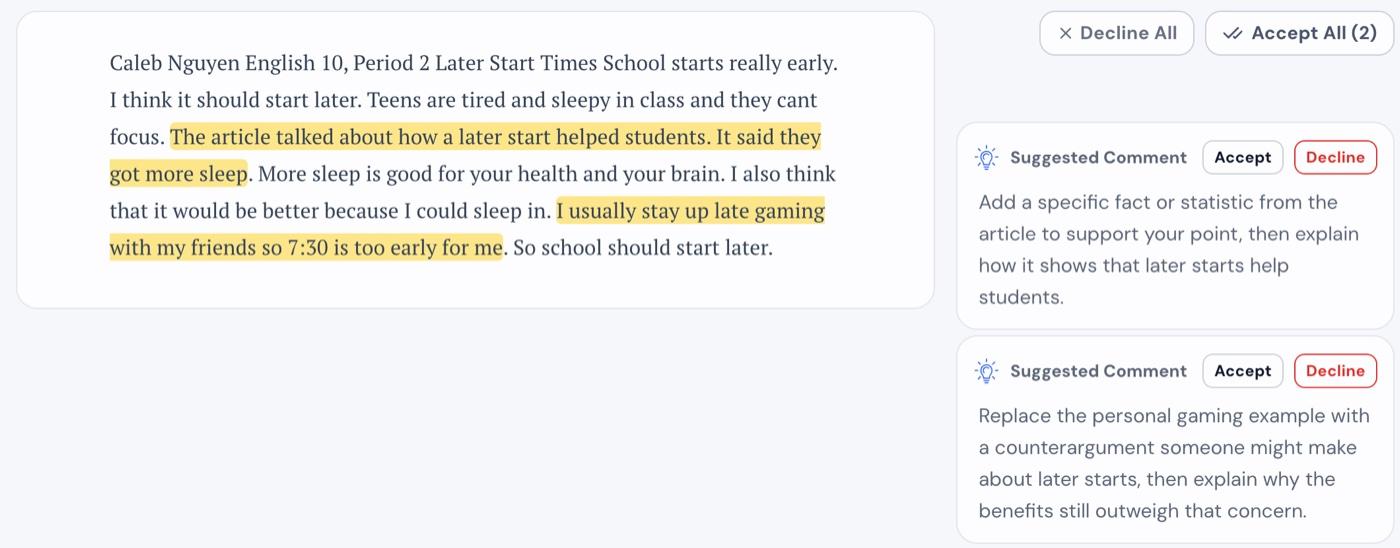
- The student's writing in the middle, with the passages AutoMark commented on highlighted.
- Suggested comments on the right. Each one is tied to a highlighted passage.
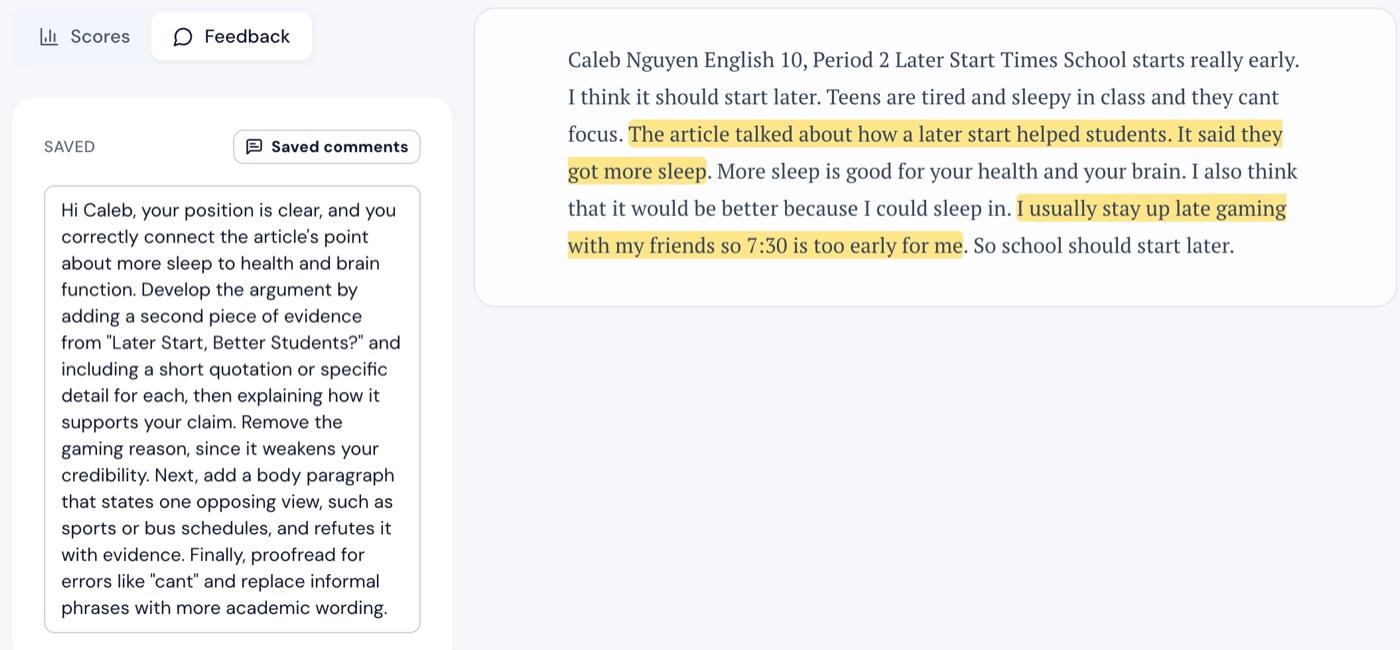
Open the Feedback tab to read the overall feedback written to the student. You can edit it like any text box, and Saved comments keeps feedback you reuse.
Now make it yours:
- Read the reasoning. Select Explanation under any criterion.
- Change any score by selecting a different level. The original suggestion stays visible so you can see what you changed. Below, the explanation says the thesis is a plain opinion, so the teacher moved it from the suggested 3 to a 2.
- Accept, edit or decline each comment. Accepted comments carry your name. Use Accept All if they all look right.
- Select Approve & next to approve the paper and move to the next one.
Grading a big class? Review your first three papers one by one. Then Grade Remaining grades the rest of the class at once, using your edits from those first papers as a guide. You still review and approve each one.
Step 6: Return grades and feedback
When every paper is approved, you can send everything back to students.
If your course is connected to your LMS, select Review & return feedback on the assignment. Choose what to send (scores, rubric scores, overall feedback, inline comments or a PDF) and AutoMark posts them to your gradebook.
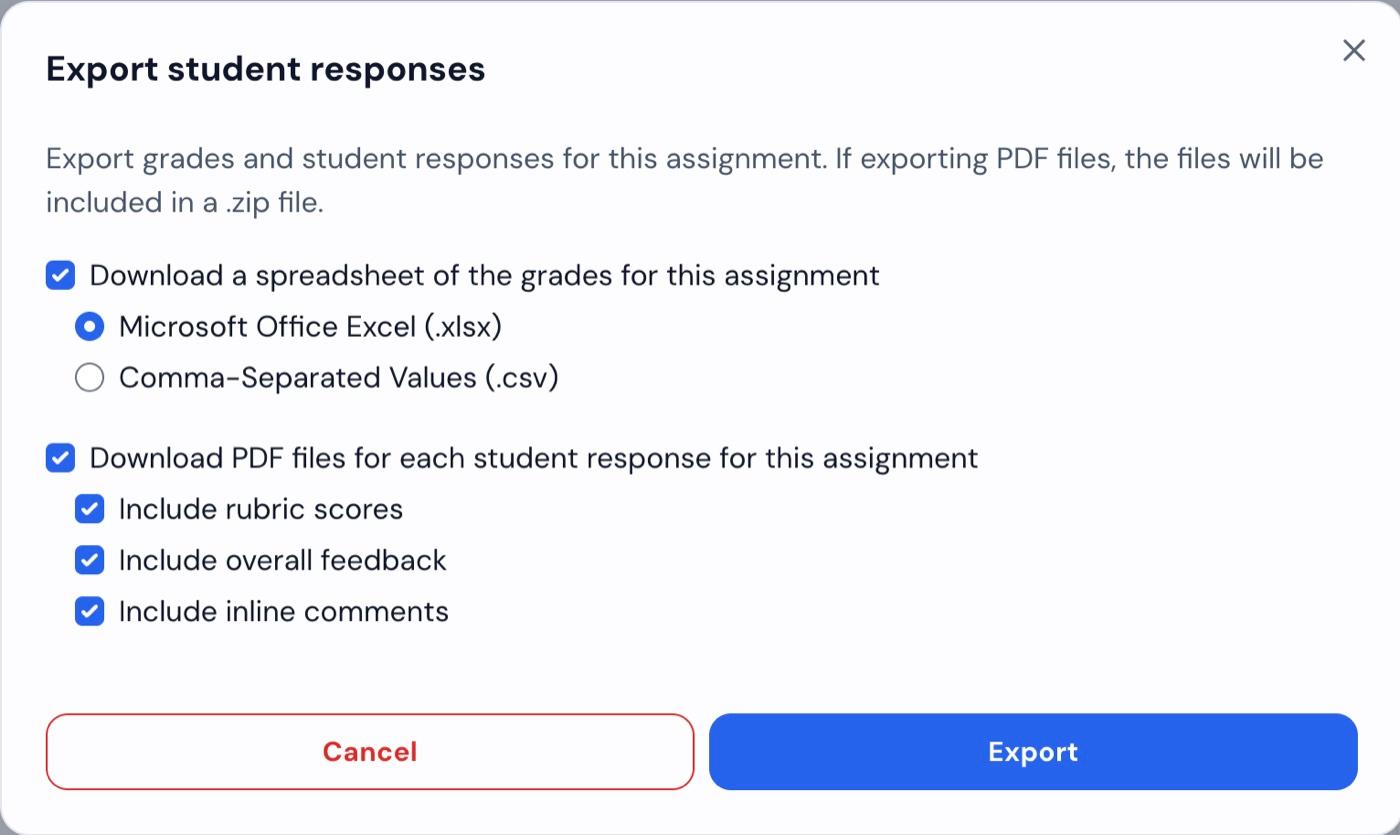
If you uploaded files, select Download. You can download a gradebook spreadsheet (Excel or CSV), a PDF for each student with their scores, feedback and comments, or both.
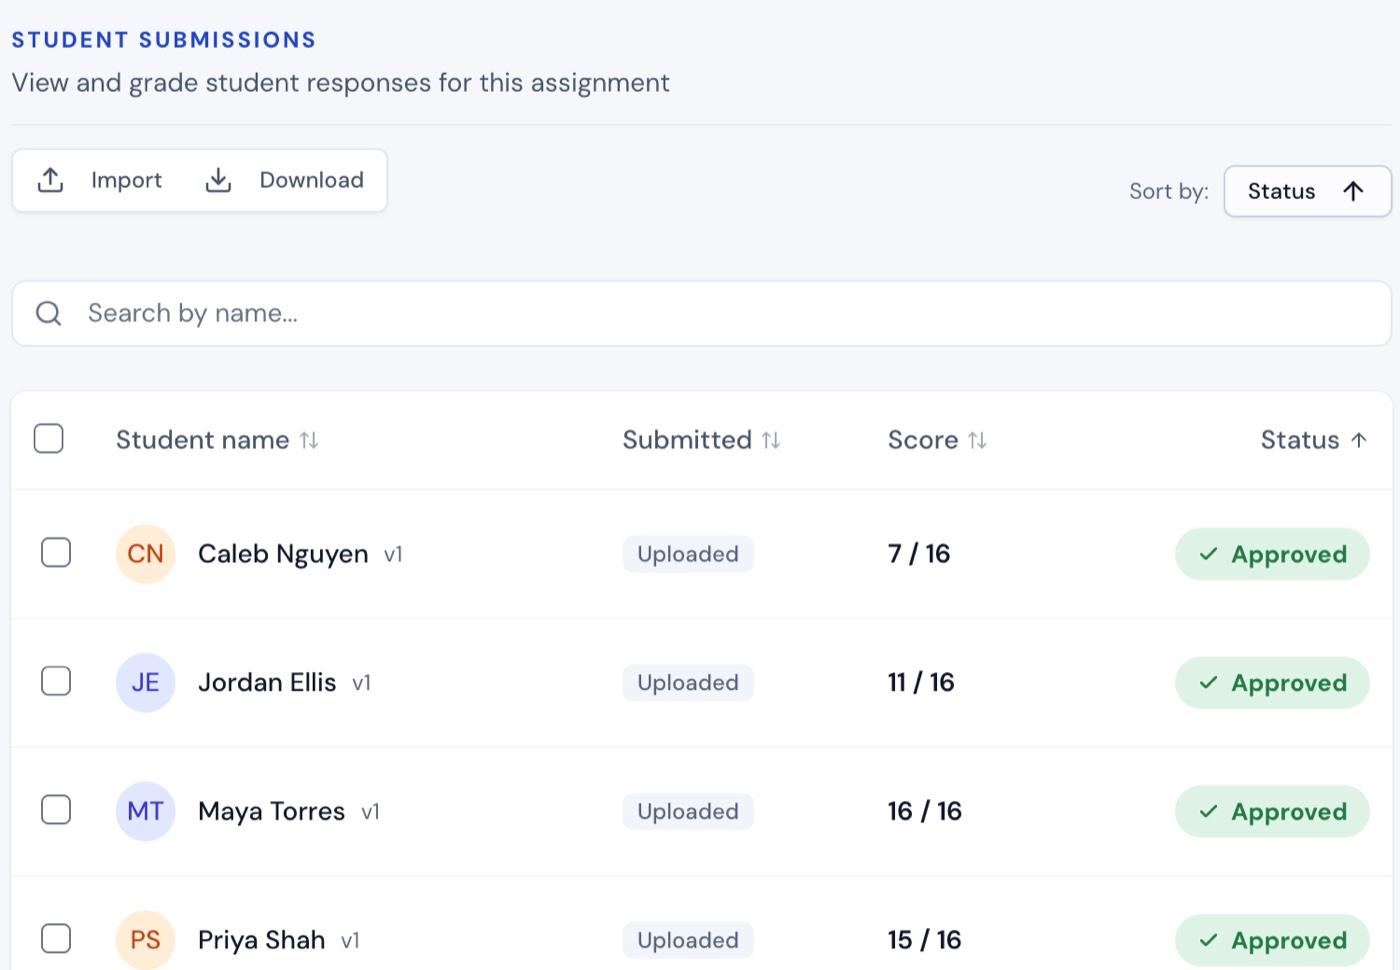
The assignment page keeps the full picture: every student, their score and their status.
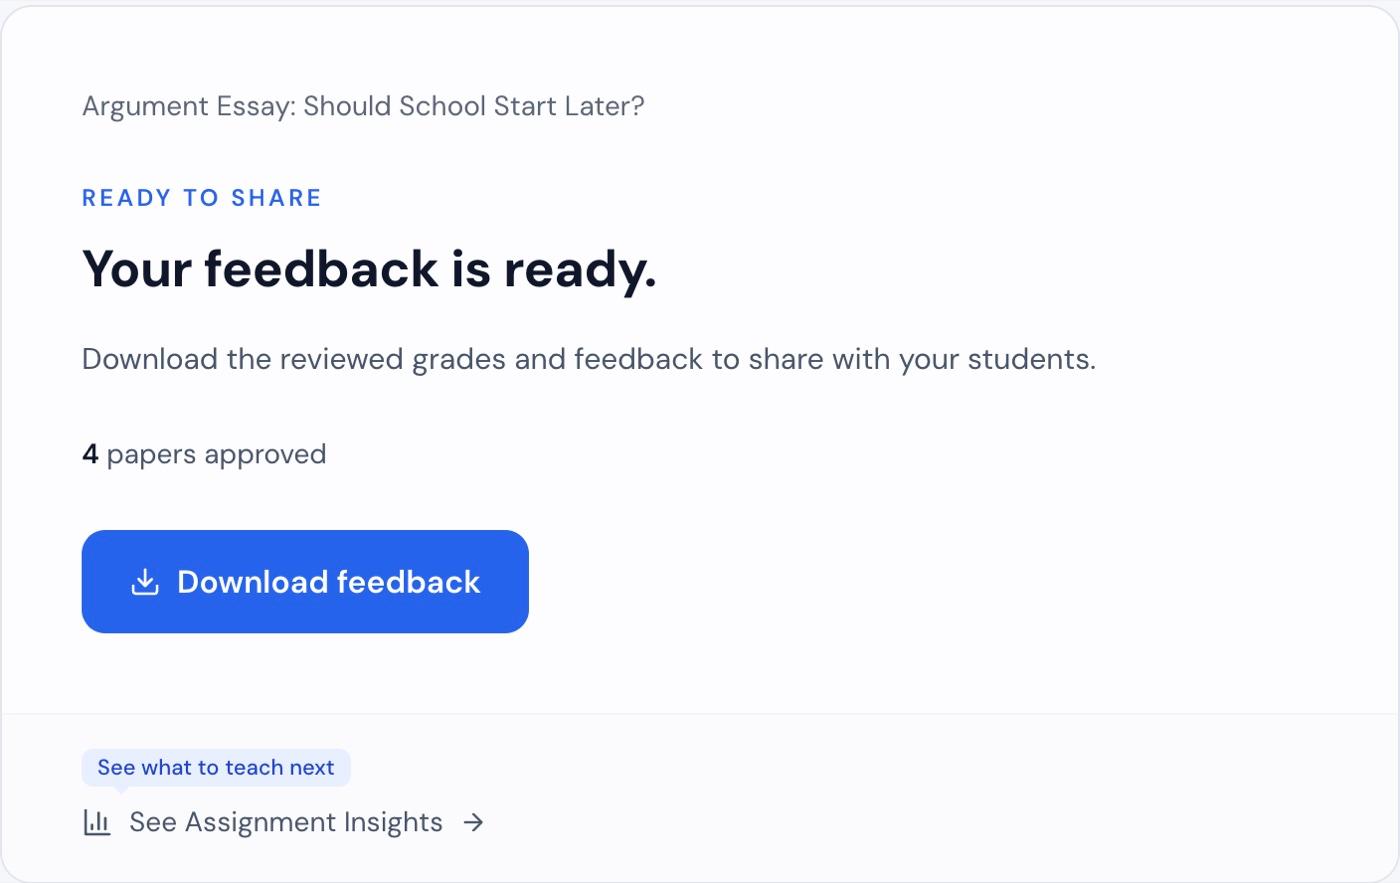
See Assignment Insights shows which rubric skills the class did well on and where it struggled, so you can decide what to teach next.
Tips
- Write the prompt in. Feedback is sharper when AutoMark knows exactly what you asked students to do.
- Make the rubric say what you mean. Level descriptions are the standard AutoMark scores against, so edit vague ones.
- Edit early. Changes you make on your first few papers help shape how the rest of the class is graded.
- One credit per graded paper. Your balance is at the bottom of the sidebar.
Questions? Email support@automark.io.