Canvas Integration Guide
Step-by-step instructions to connect AutoMark with Canvas LMS for automatic grade passback and inline feedback.
AutoMark integrates with Canvas through LTI 1.3 (Learning Tools Interoperability), allowing teachers to grade assignments directly from Canvas with automatic grade passback to the gradebook.
This guide walks a Canvas administrator through the full setup process — from installing the LTI tool to connecting Canvas OAuth for course sync. It takes about 15 minutes.
Prerequisites
- Canvas admin access (Site Admin or Sub-Account Admin)
- Your AutoMark account (sign up at automark.io)
Part 1: Install AutoMark as an LTI Tool
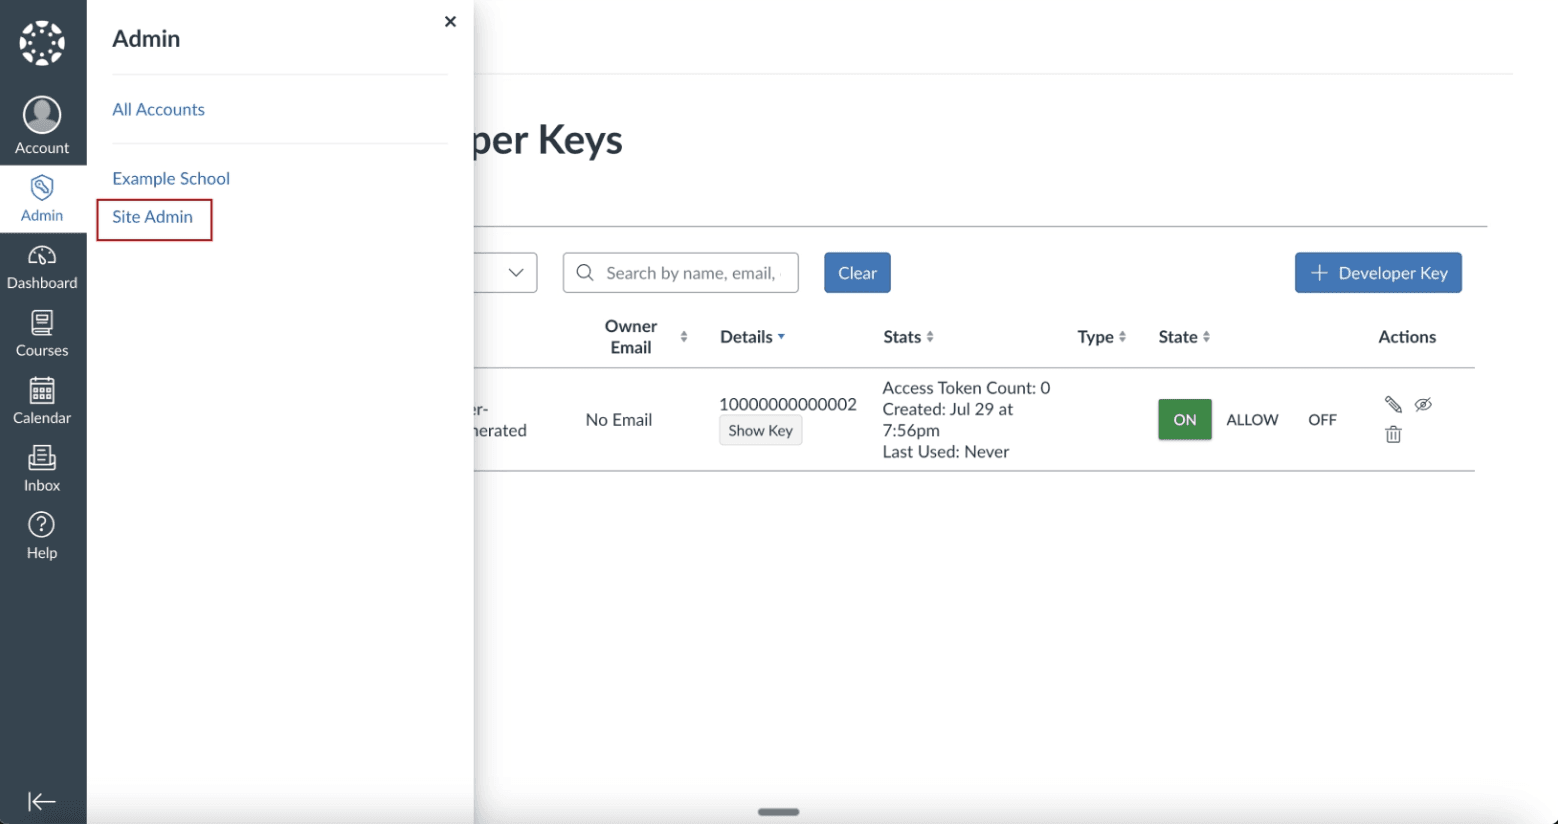
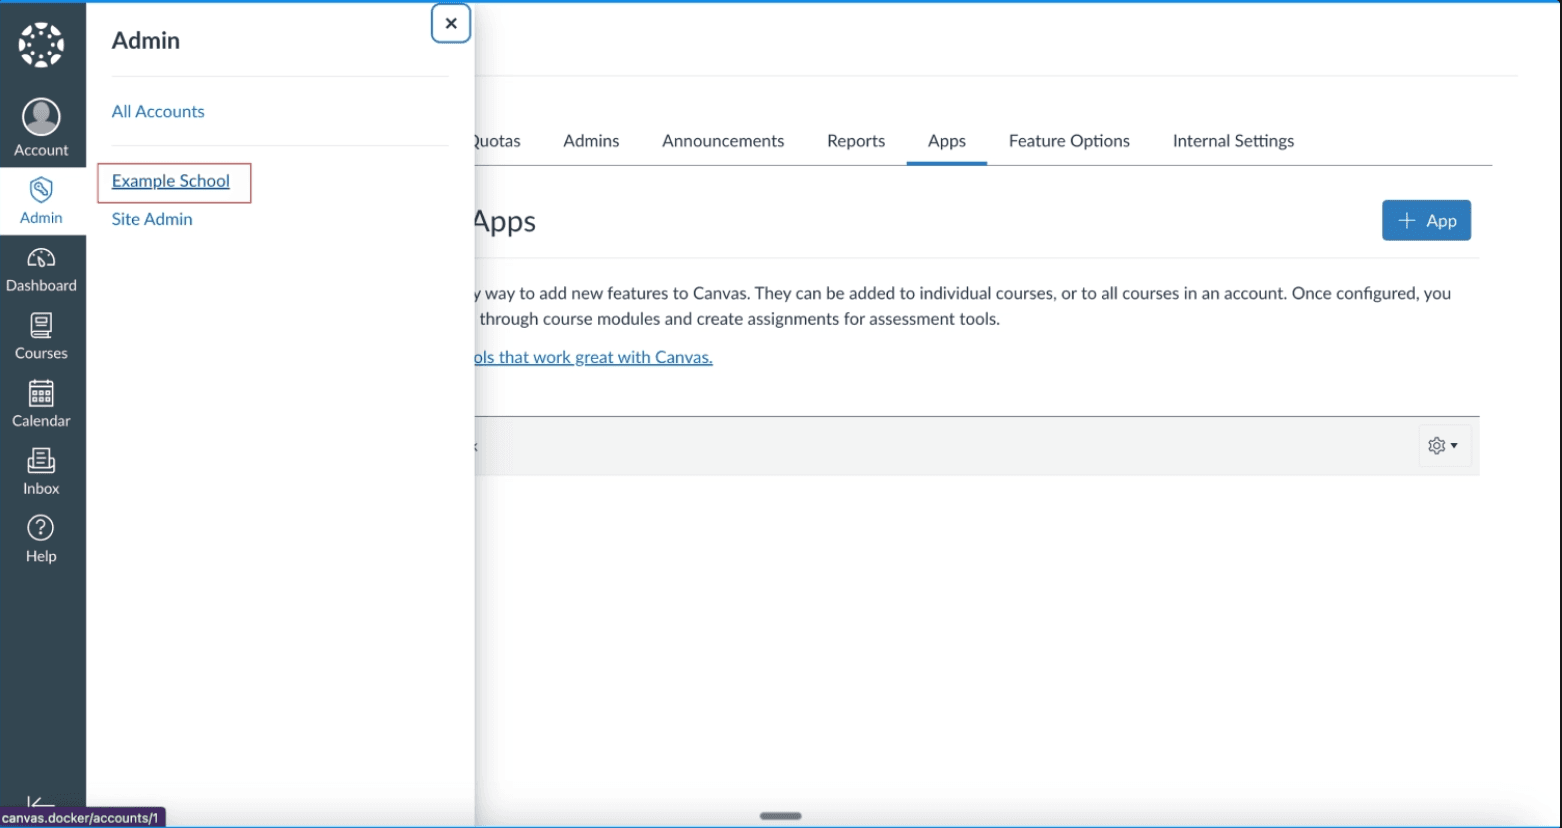
Step 1: Navigate to Site Admin
Log in to Canvas as an administrator. In the left sidebar, click Admin, then select your institution.
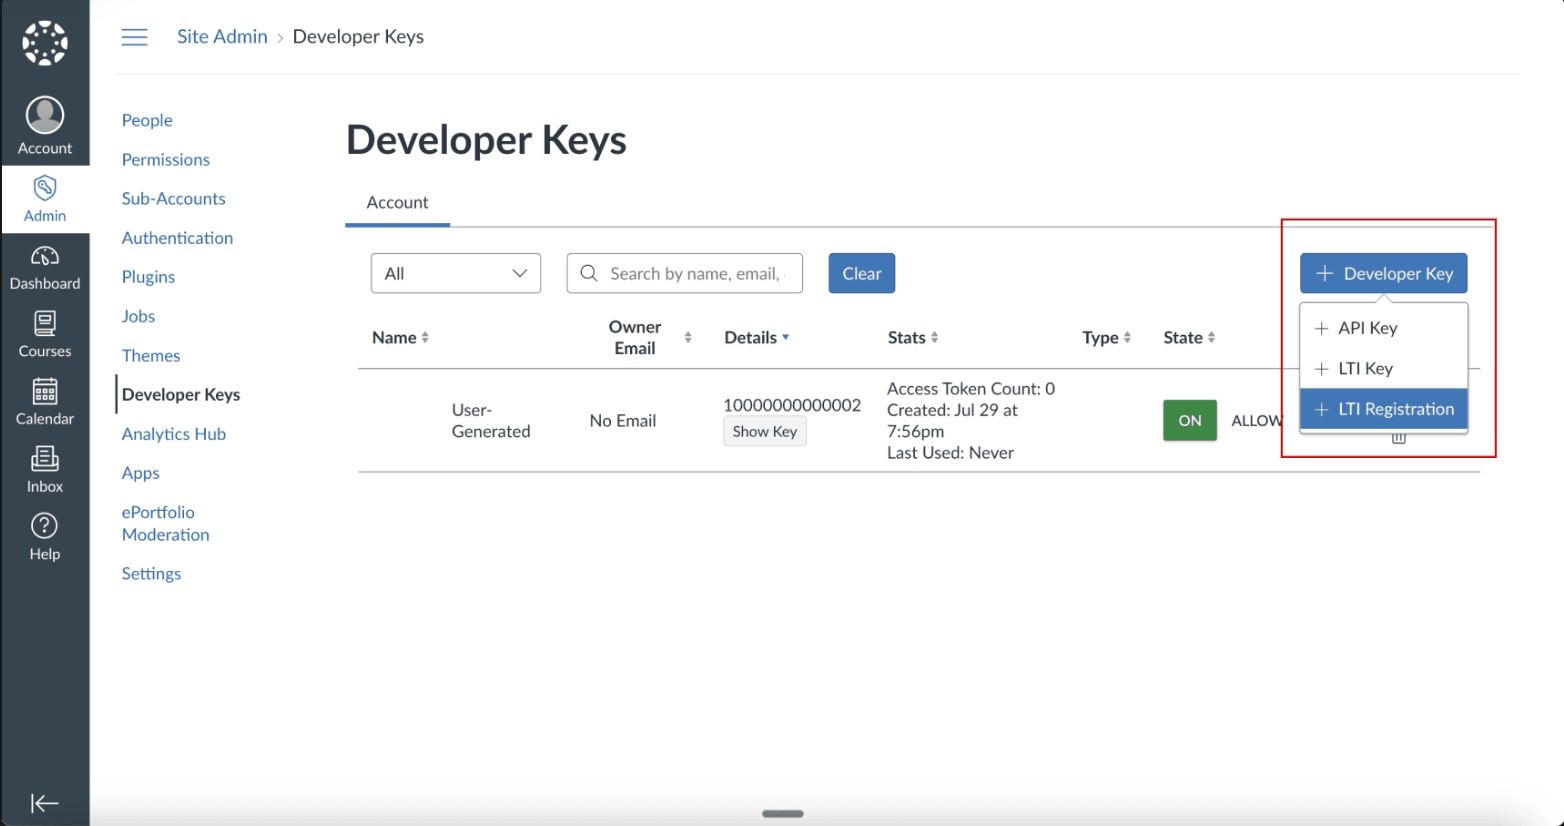
Step 2: Open Developer Keys
In the Admin panel, click Developer Keys in the left navigation menu. Then click the + Developer Key button and select + LTI Registration.
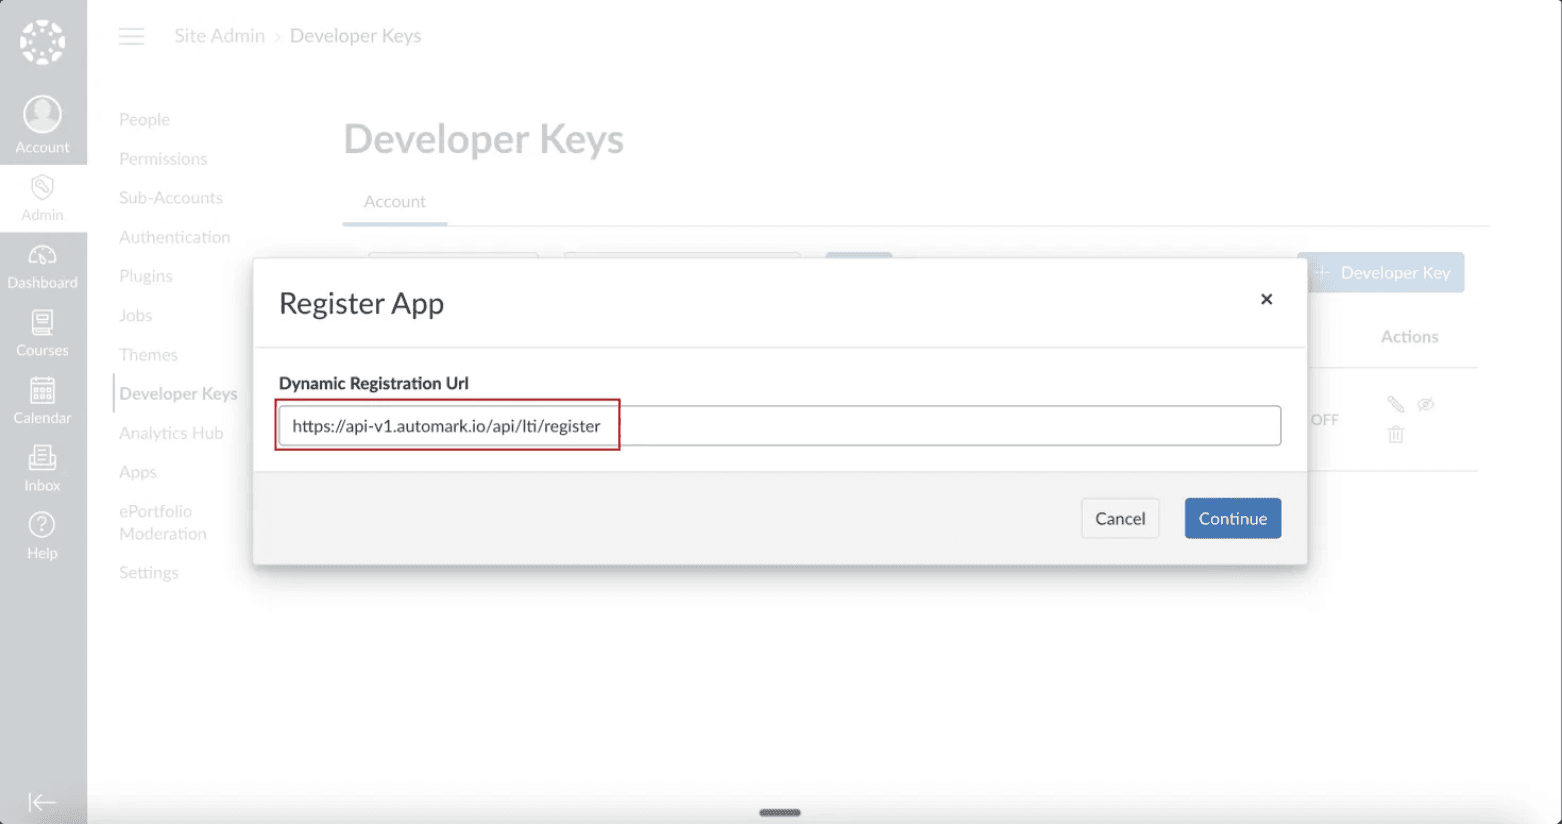
Step 3: Enter Dynamic Registration URL
In the Dynamic Registration dialog, paste the following URL:
https://api-v1.automark.io/api/lti/register
Click Continue to proceed.
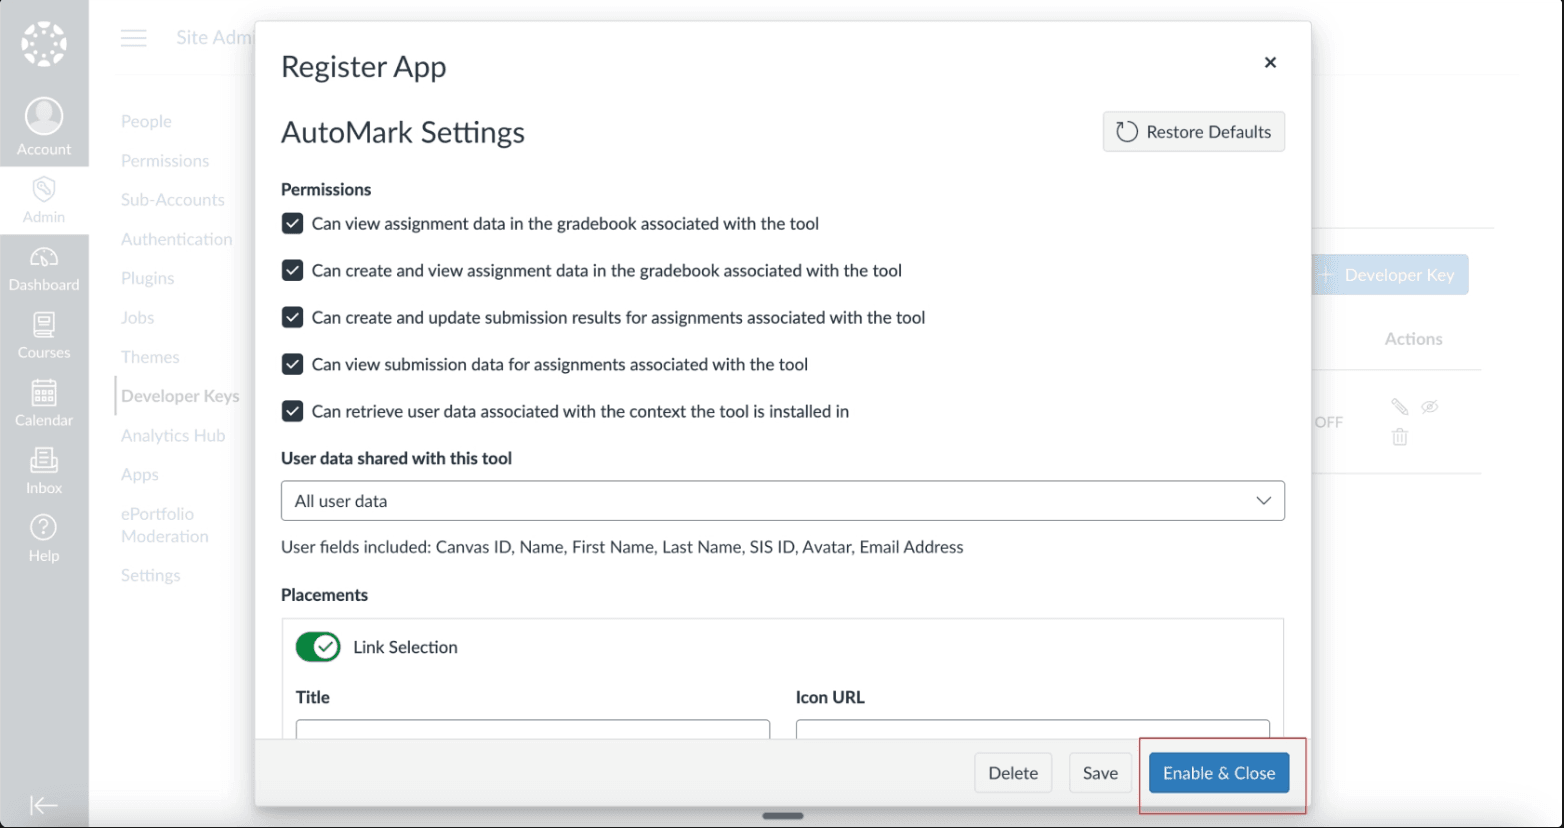
Step 4: Enable and Close Registration
Canvas will display the AutoMark registration configuration. Click Enable & Close to accept the default settings and complete the registration.
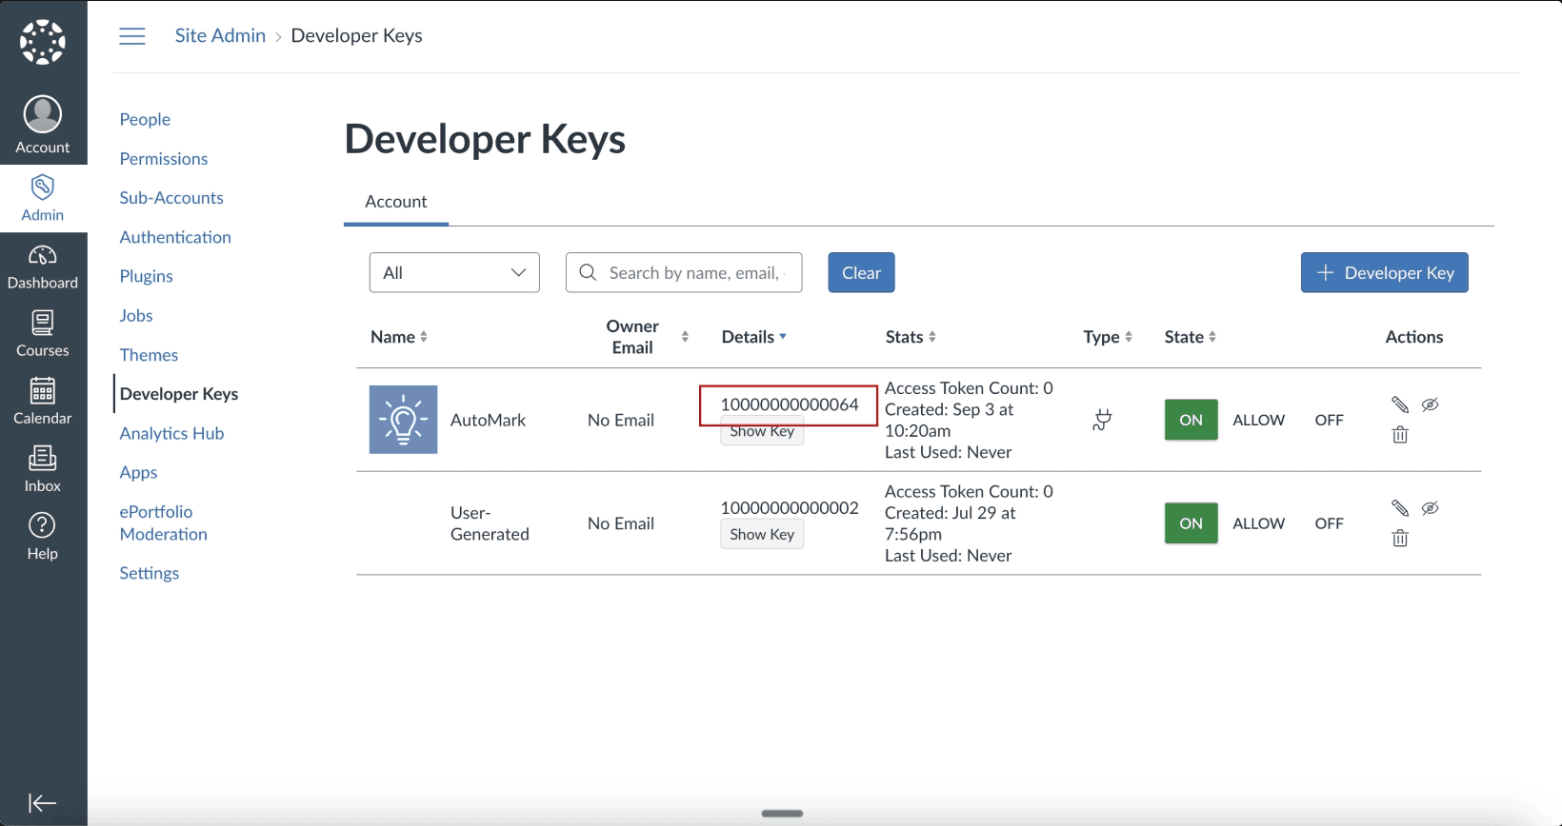
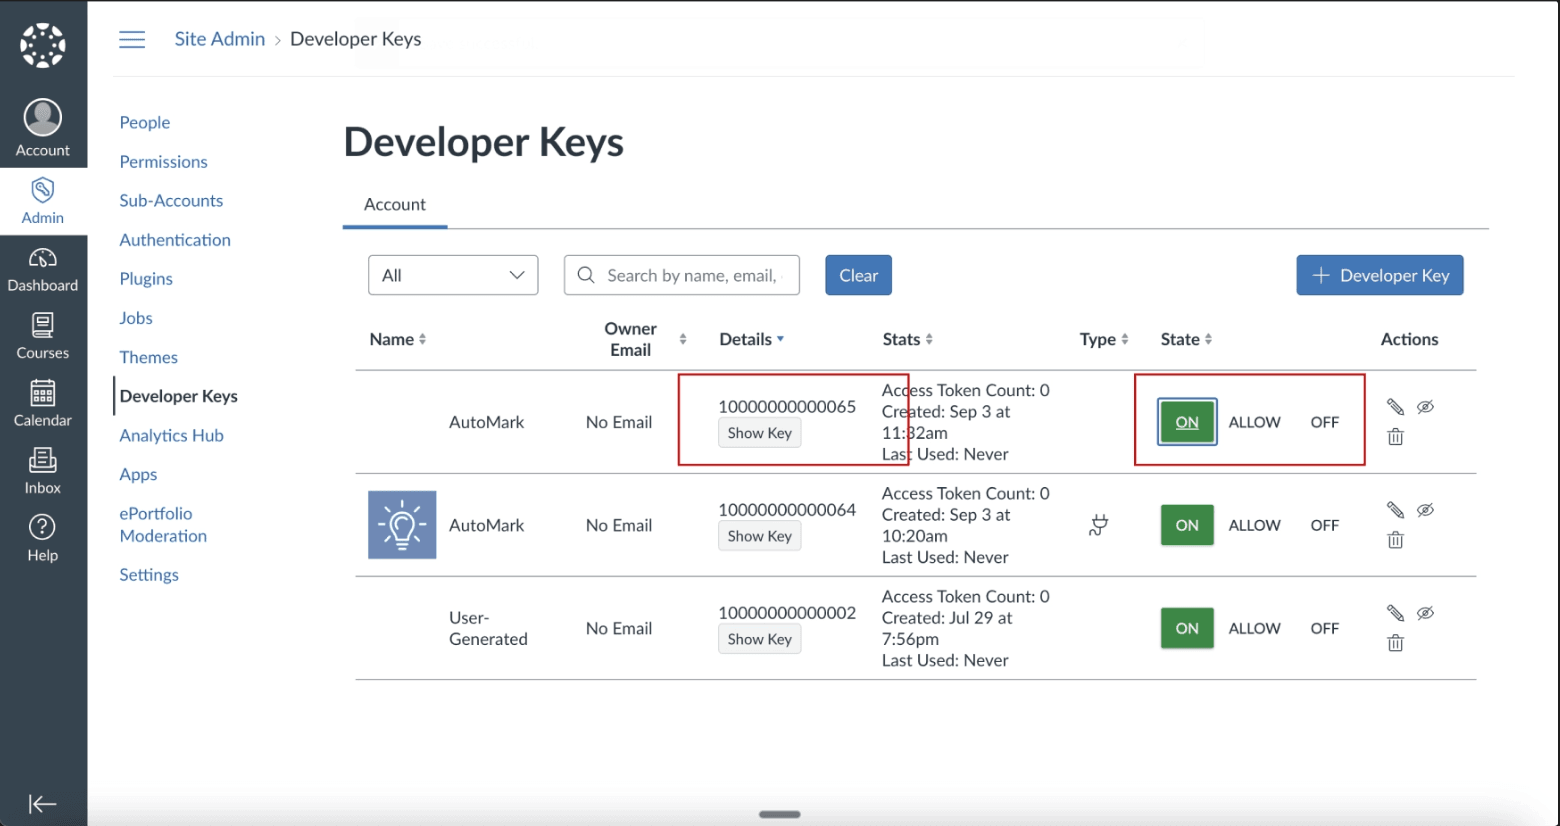
Step 5: Confirm Developer Key is ON
After registration, you'll return to the Developer Keys page. Verify that the AutoMark LTI key shows a status of ON (green toggle). If it shows OFF, click the toggle to enable it.
Copy the key number (Client ID) — you'll need this in the next steps.
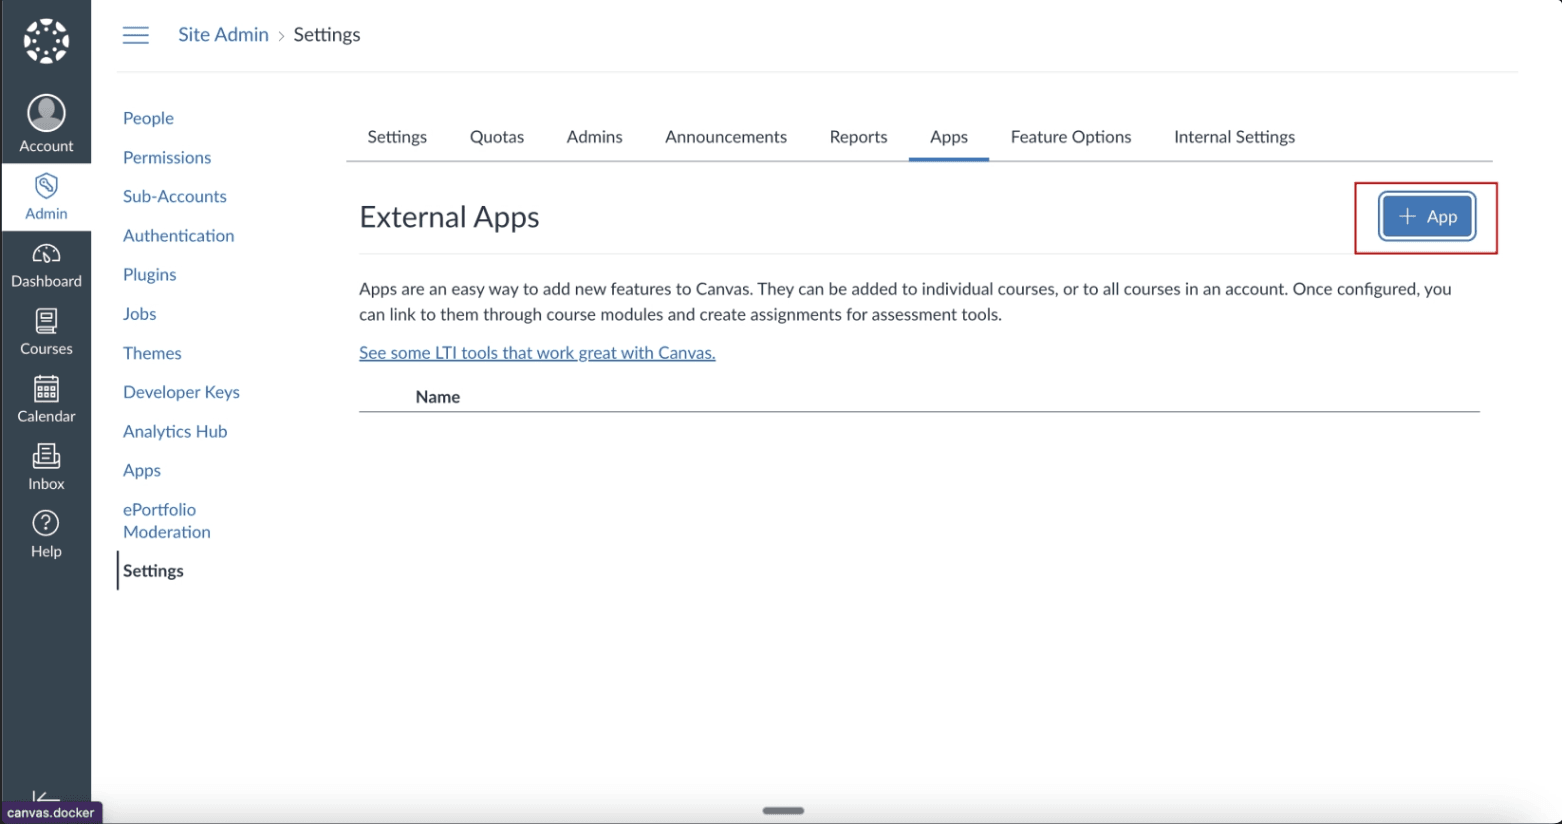
Step 6: Add AutoMark as an App
Navigate to Settings in the left sidebar, then click the Apps tab. Click View App Configurations, then the + App button.
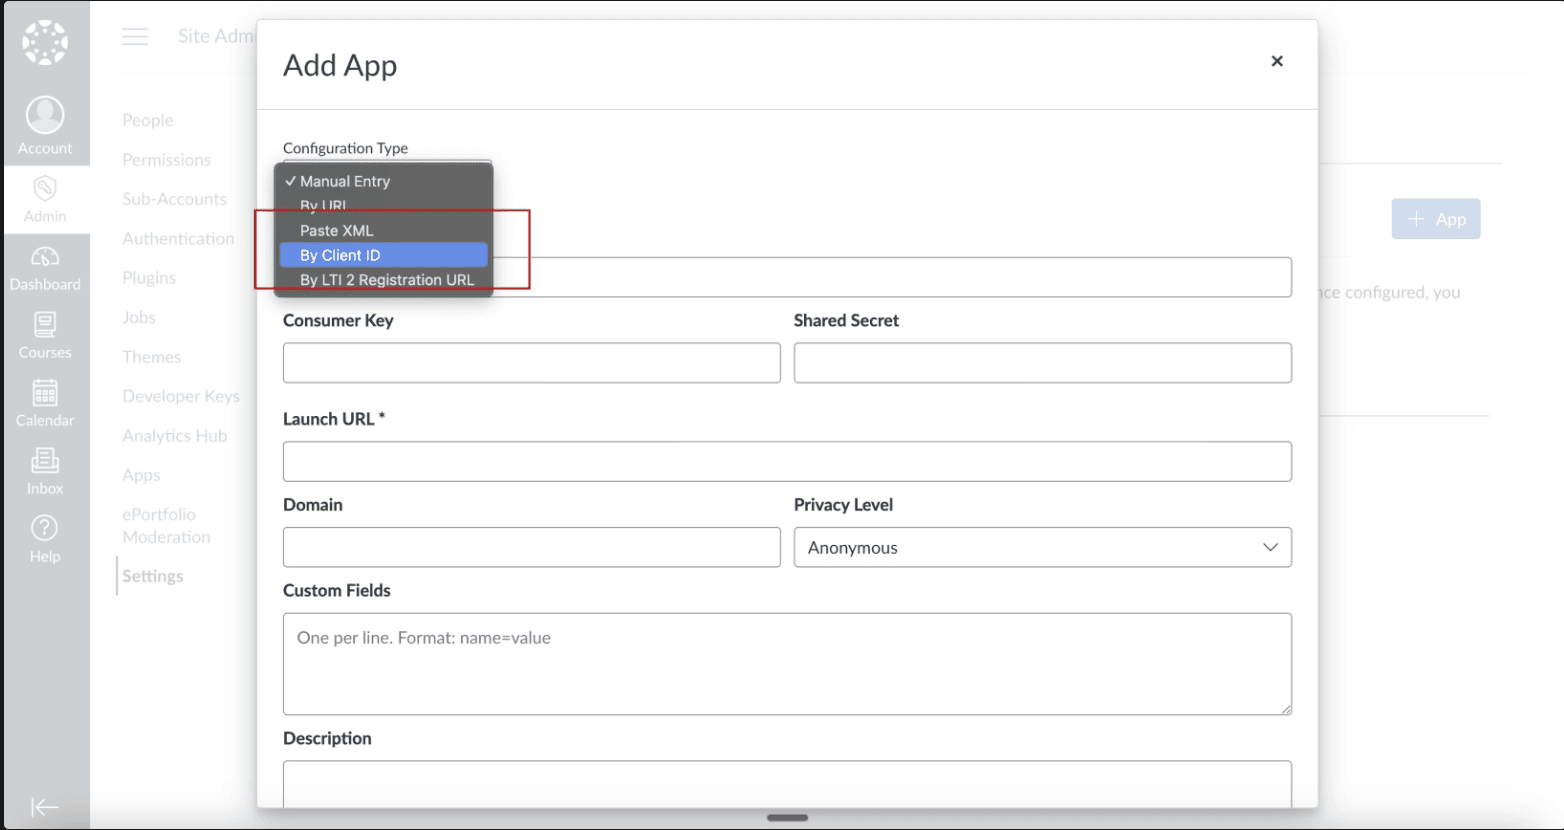
Step 7: Select "By Client ID"
In the "Add App" dialog, choose the By Client ID option from the Configuration Type dropdown.
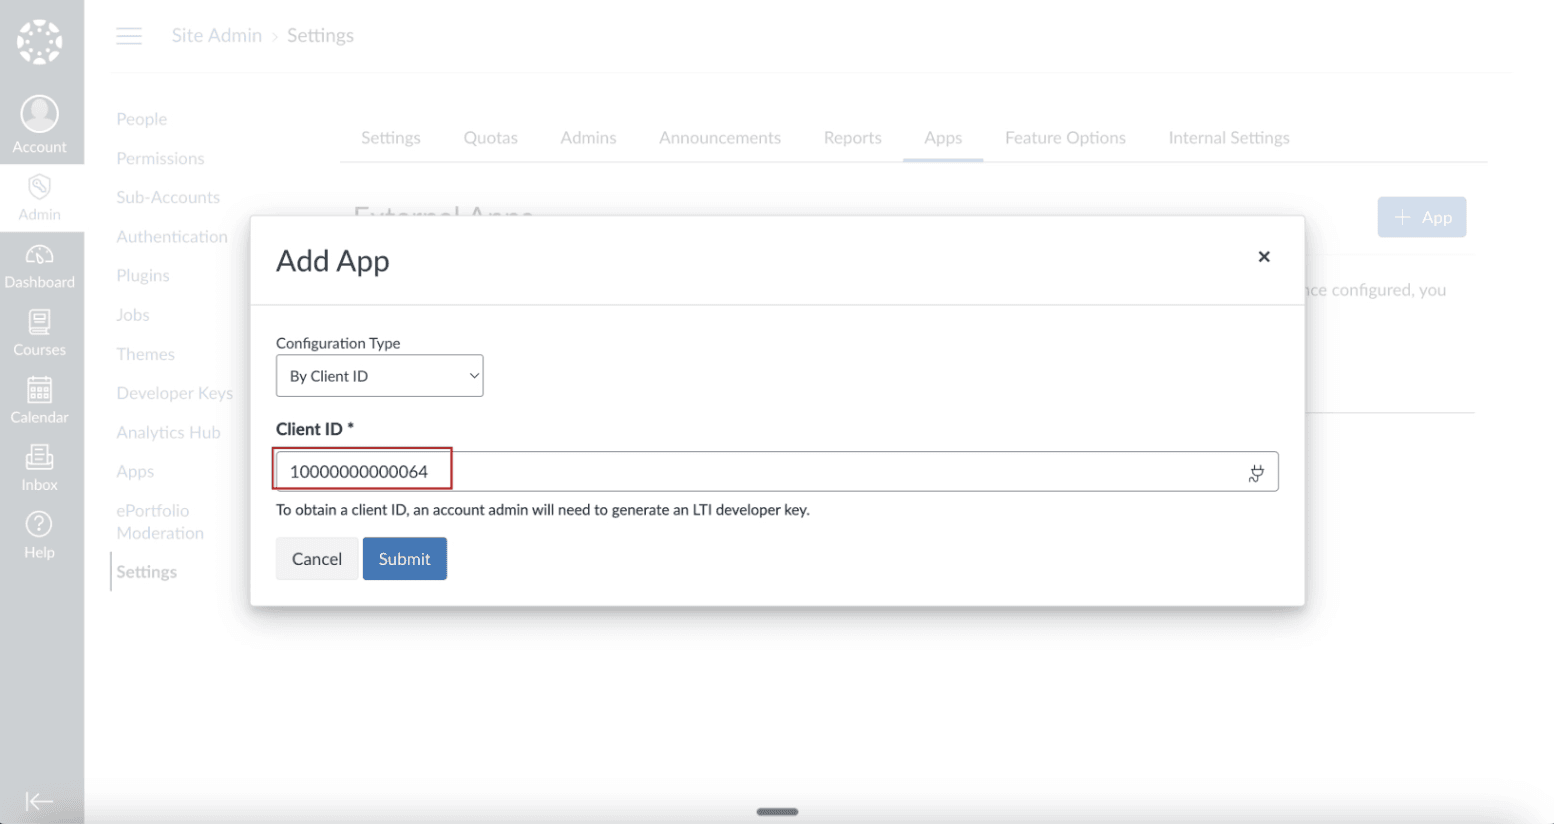
Step 8a: Enter Client ID (Site Admin)
Enter the Client ID you copied from the Developer Keys page in Step 5.
Step 8b: Enter Client ID (Sub-Account)
If your Canvas instance uses sub-accounts, repeat Steps 6–8a for each sub-account where you want AutoMark available. Navigate to the sub-account's Settings → Apps to install it there.
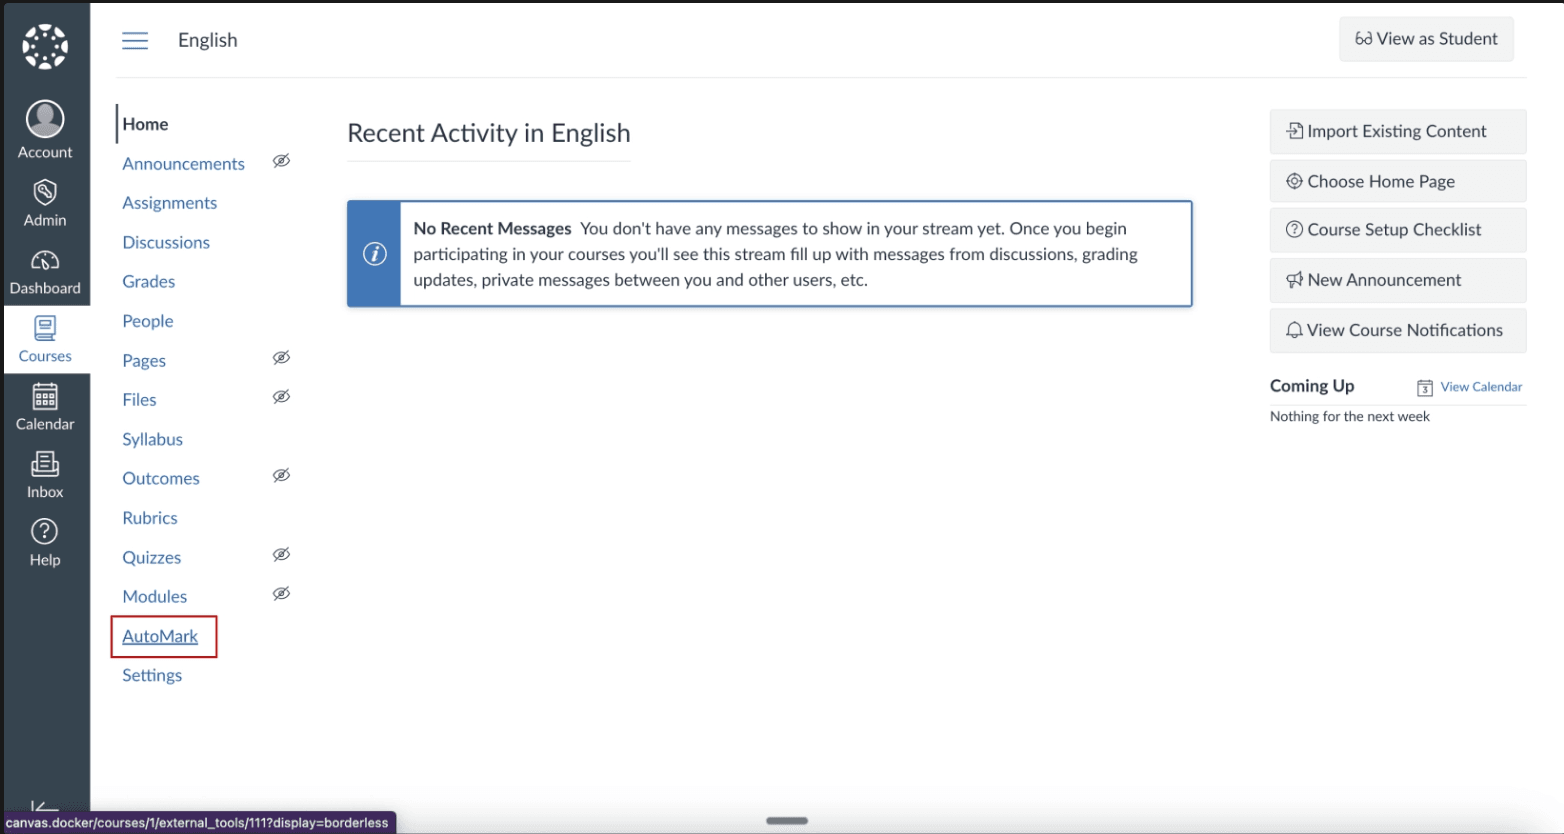
Step 9: Confirm AutoMark App Installed
Once installed, AutoMark will appear in the course navigation for teachers. They can click the AutoMark link in the sidebar to launch the tool.
Important: After completing the LTI registration, contact AutoMark support (or Holden, holden@automark.io) with your Canvas instance URL. We need to activate your platform on our end before the tool will work. Until activated, teachers will see an error when trying to launch AutoMark from Canvas.
Part 2: Connect Canvas OAuth (Course Sync & Grades)
For AutoMark to sync courses and pass grades back to Canvas, you'll need to create an API key and connect it to your AutoMark organization.
Step 10: Open Organization Settings in AutoMark
In AutoMark, go to Organization Settings and find the Canvas Integration section. You'll see fields for Client ID, Client Secret, and Canvas Base URL.

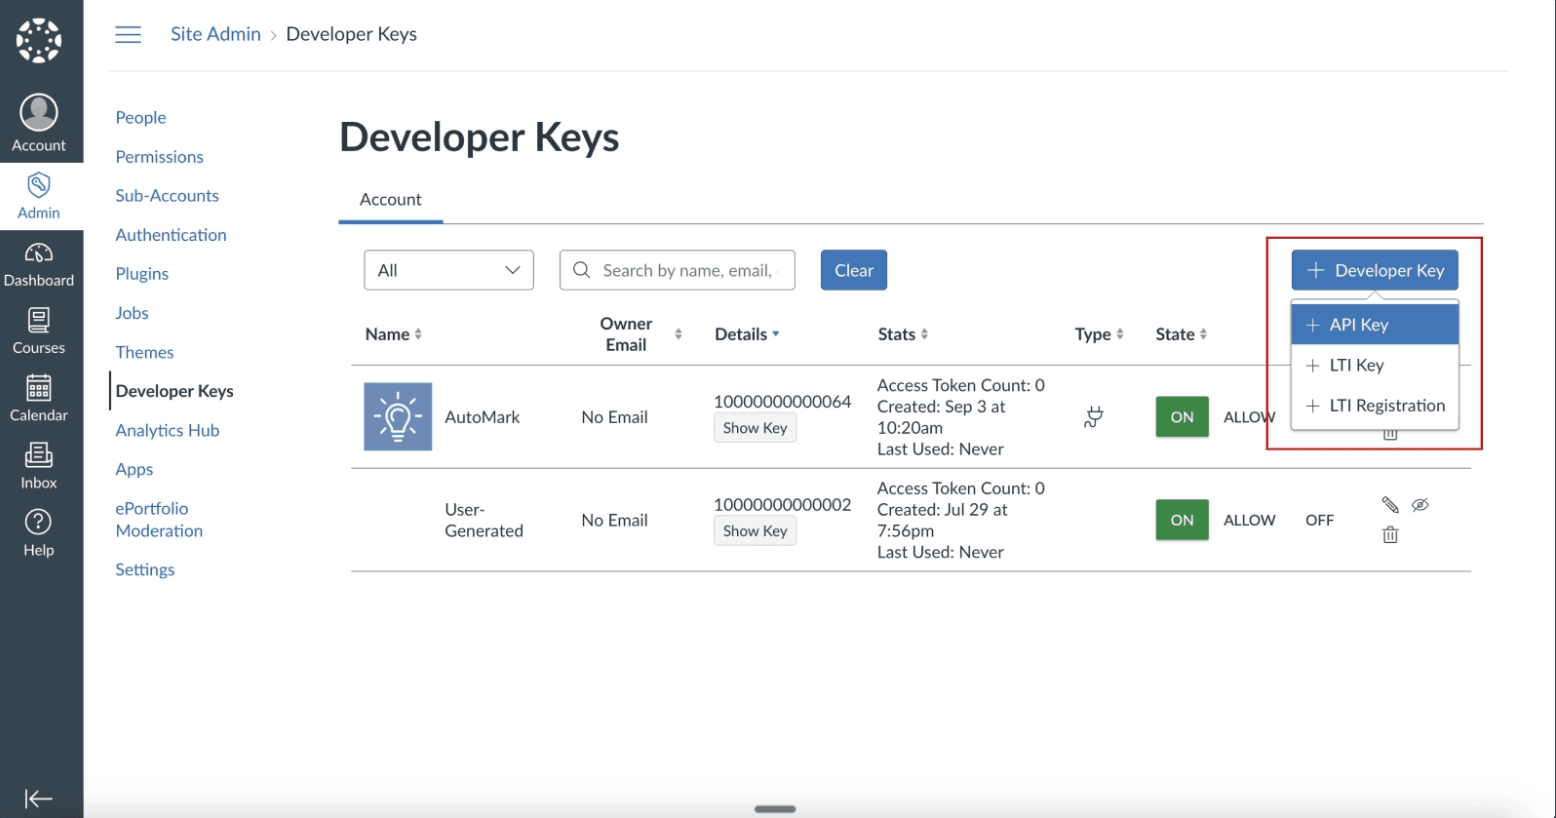
Step 11a: Create an API Key in Canvas
Back in Canvas Admin, go to Developer Keys and click + Developer Key, then select + API Key.
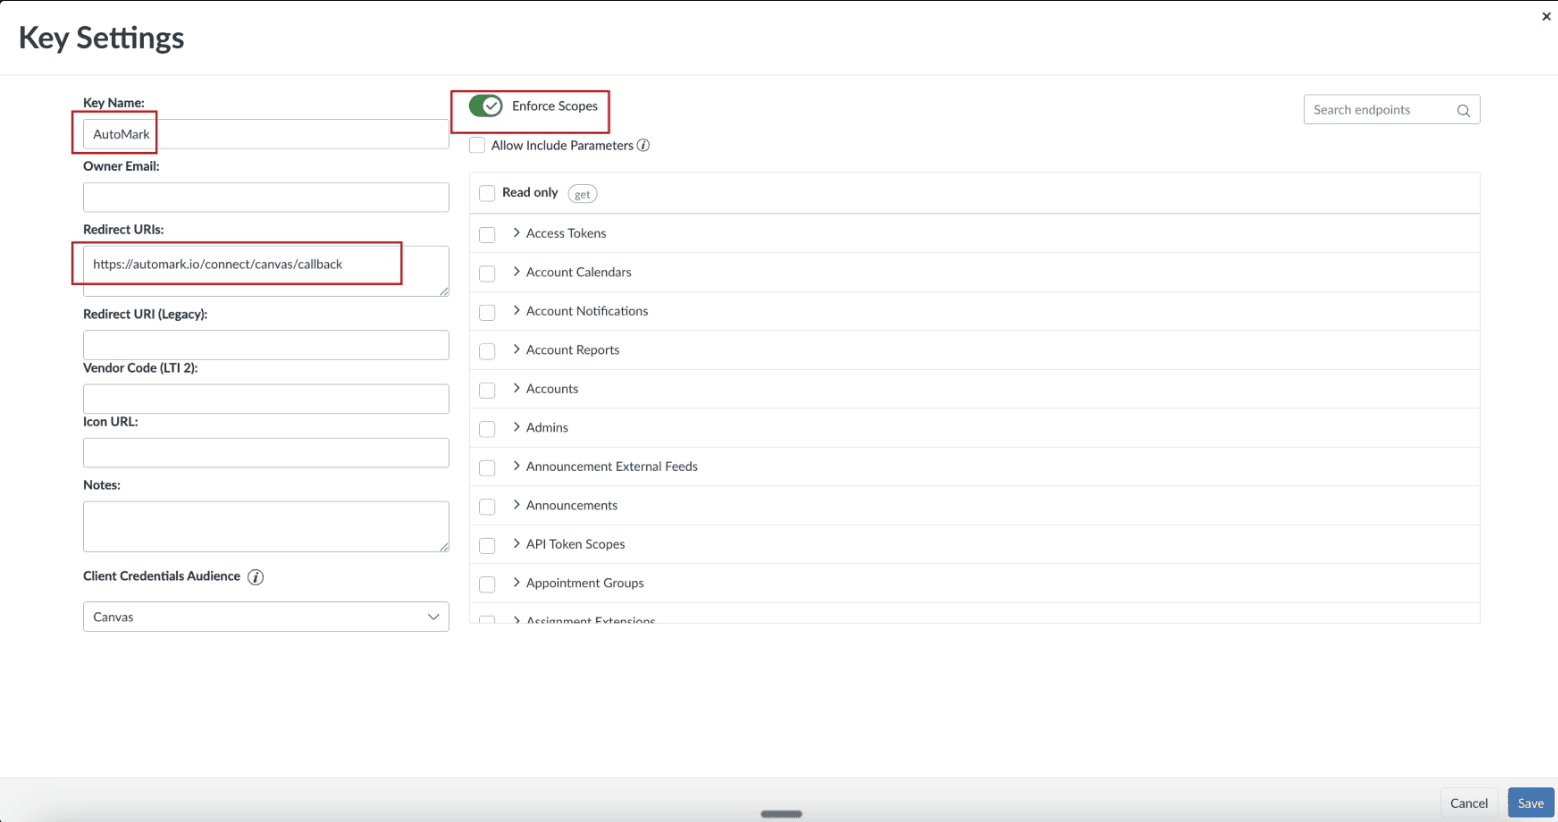
Step 11b: Configure the API Key
Fill in the Key Settings:
- Key Name: AutoMark
- Redirect URIs: Enter the redirect URI shown in your AutoMark Organization Settings
- Check Enforce Scopes
- Select the following scopes:
| Category | Scopes |
|---|---|
| Courses | url:GET|/api/v1/courses, url:GET|/api/v1/courses/:id |
| Assignments | url:GET|/api/v1/courses/:course_id/assignments, url:GET|/api/v1/courses/:course_id/assignments/:id |
| Enrollments | url:GET|/api/v1/courses/:course_id/enrollments |
| Files | url:GET|/api/v1/files/:id, url:GET|/api/v1/files/:id/public_url |
| Rubrics | url:GET|/api/v1/courses/:course_id/rubrics, url:GET|/api/v1/courses/:course_id/rubrics/:id, url:POST|/api/v1/courses/:course_id/rubrics |
| Submissions | url:POST|/api/v1/courses/:course_id/assignments/:assignment_id/submissions/:user_id/comments/files, url:GET|/api/v1/courses/:course_id/assignments/:assignment_id/submissions, url:GET|/api/v1/courses/:course_id/assignments/:assignment_id/submissions/:user_id, url:PUT|/api/v1/courses/:course_id/assignments/:assignment_id/submissions/:user_id |
| Users | url:GET|/api/v1/users/:id |
| Quizzes | url:GET|/api/v1/courses/:course_id/quizzes, url:GET|/api/v1/courses/:course_id/quizzes/:id, url:GET|/api/v1/courses/:course_id/quizzes/:quiz_id/questions, url:GET|/api/v1/courses/:course_id/quizzes/:quiz_id/submissions, url:GET|/api/v1/courses/:course_id/quizzes/:quiz_id/submissions/:id, url:GET|/api/v1/quiz_submissions/:quiz_submission_id/questions, url:GET|/api/v1/courses/:course_id/quizzes/:quiz_id/submissions/:id/events |
Note: The Quiz submission events scope requires Quiz Log Auditing to be enabled in your Canvas account settings (Account → Settings → Feature Options). This is needed for importing student answers from Classic Quizzes that use Question Banks.
Click Save Key.
Step 11c: Activate the Key and Copy Credentials
After saving, the new API key will appear in your Developer Keys list. Make sure the key is toggled ON, then:
- Copy the Client ID (the number shown)
- Click Show Key to reveal and copy the Client Secret
Step 12a: Add Credentials to AutoMark
Back in AutoMark Organization Settings, enter:
- Client ID — the API key Client ID from Canvas
- Client Secret — the secret you copied
- Canvas Base URL — your Canvas instance URL (e.g.,
https://yourschool.instructure.com)
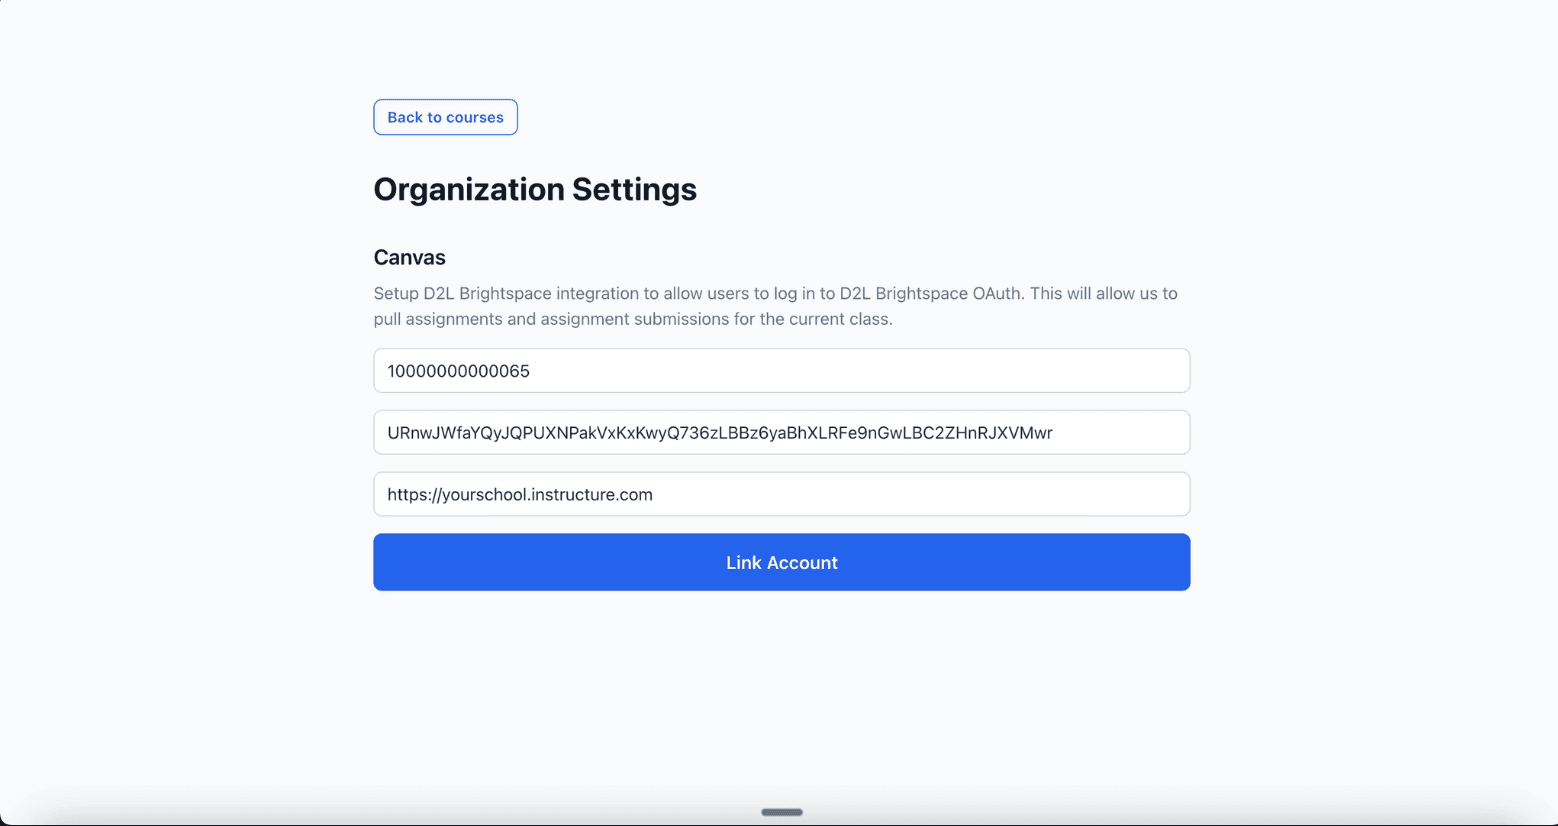
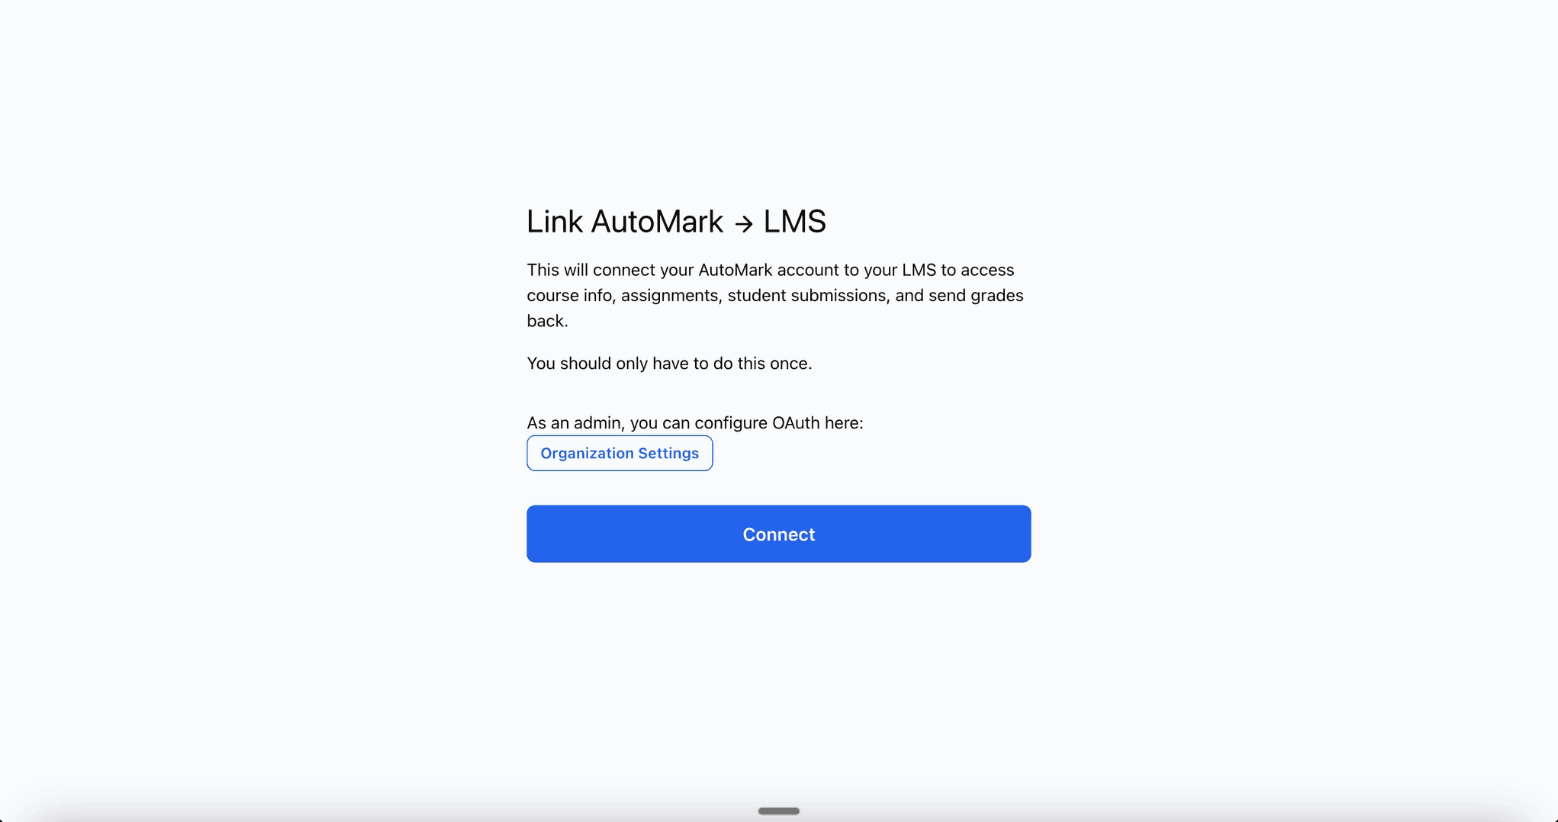
Step 12b: Click Connect
Click the Connect button in AutoMark to initiate the OAuth connection with Canvas.
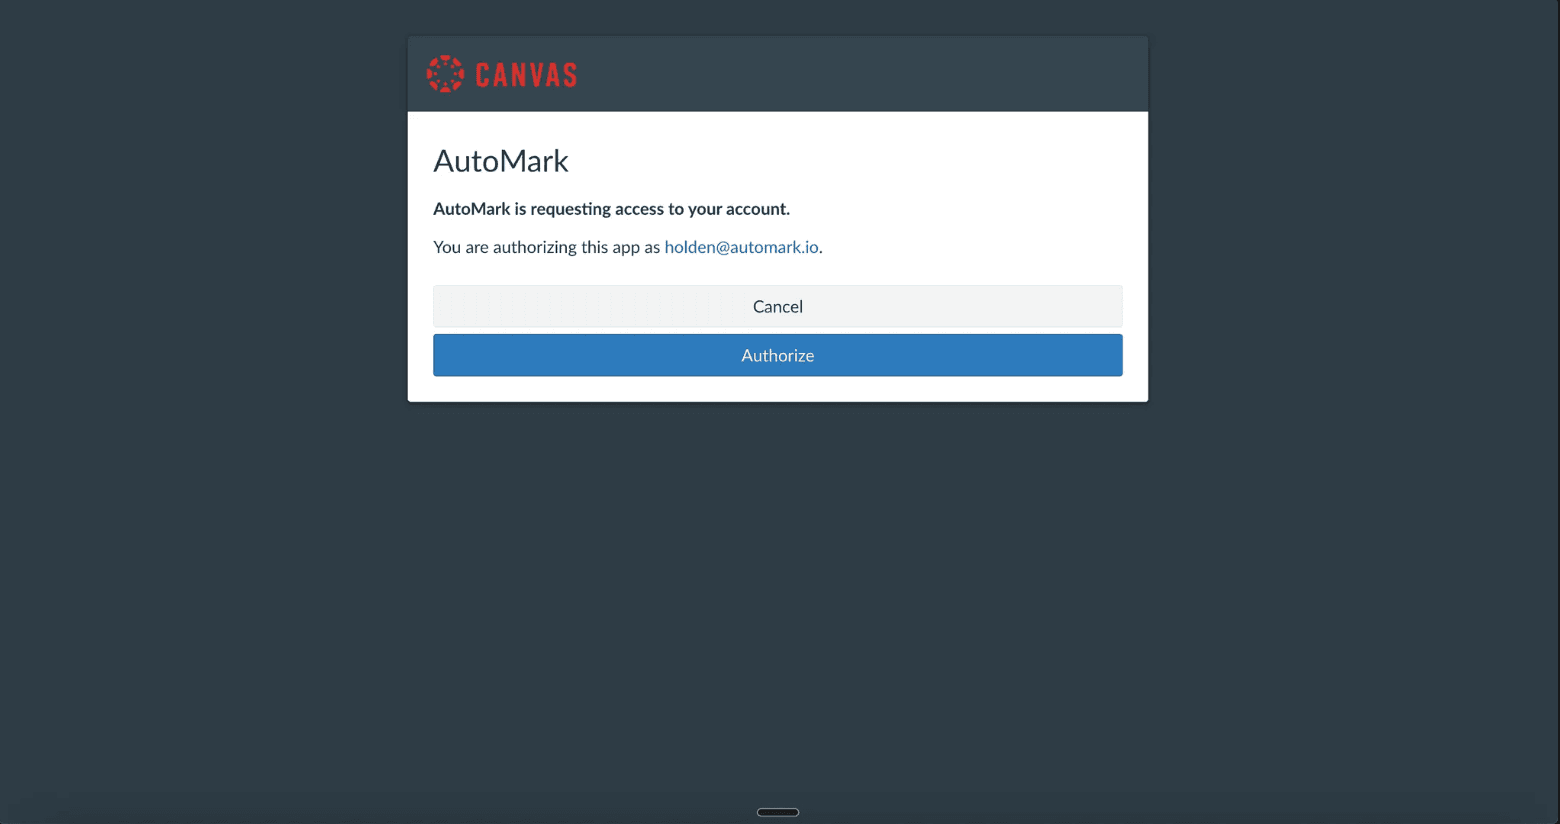
Step 12c: Authorize in Canvas
Canvas will display an authorization prompt. Click Authorize to grant AutoMark access to the selected scopes.
Step 13: Integration Complete
You'll be redirected back to AutoMark with a success confirmation. The Canvas integration is now fully set up.

Teachers can now:
- Access AutoMark from their Canvas course sidebar
- Import assignments and student rosters from Canvas
- Grade with AI-powered feedback
- Automatically sync grades back to the Canvas gradebook
Troubleshooting
Developer Key won't enable: Double-check that the dynamic registration completed successfully in Steps 3–4. Try removing and re-adding the key.
AutoMark doesn't appear in courses: Ensure the app was installed at the correct admin level (Site Admin or Sub-Account). It may take a few minutes to propagate.
Grades aren't syncing back: Make sure the OAuth connection (Part 2) was completed. The LTI installation alone doesn't enable grade passback — the API key connection is required.
Canvas consortium setup: If your Canvas instance is part of a consortium (multiple schools sharing a parent Canvas installation), see our Canvas Consortium Setup Guide for the additional configuration steps required.
For additional support, email us at support@automark.io.